Homemade Meatball Sliders with Homemade Marinara Sauce

I have been going out and about trying to support the local small businesses for the past few days, but I wanted to do some cooking, and today was a good day to do it. I had a really productive day. I woke up around 3:30 AM and got some things accomplished early on. It left me with plenty of time to prepare what will probably be the basis of many meals this week.

I started by making some roasted peppers and onions, which I used with my marinara sauce and my meatball sliders. I also made an Italian type meatloaf. So there was a lot of prep work to do and a lot of good smells and tastes going on at my house this morning and afternoon.

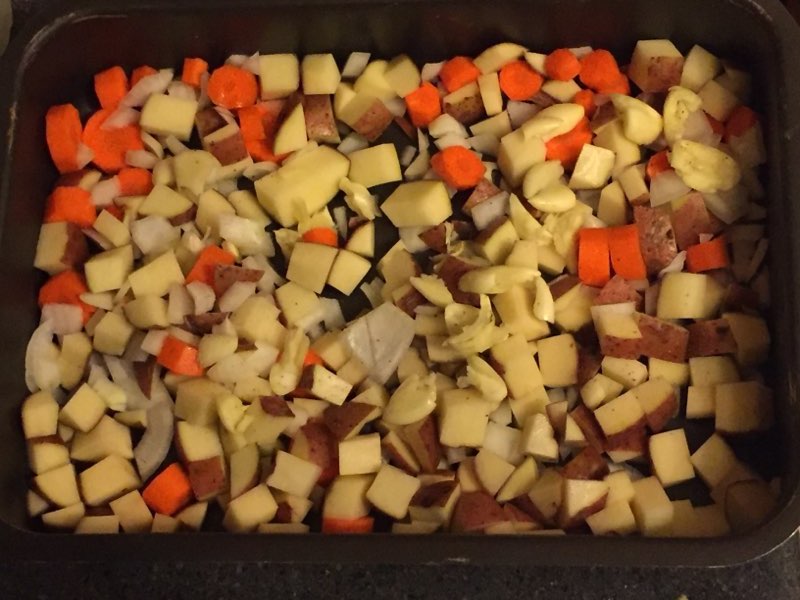
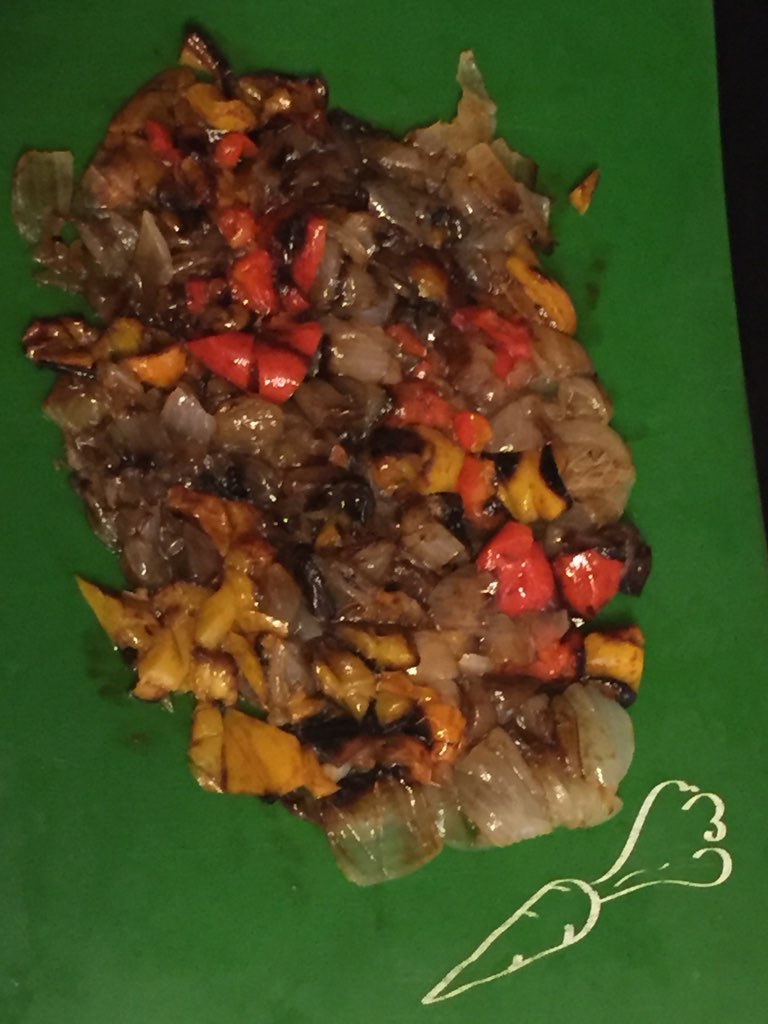
I started things off with some roasted veggies. I set the oven to 475. I coarsely chopped 3 bell peppers (one orange, one yellow, and one red), along with three medium sized onions. I drizzled some olive oil and added some fresh ground salt and pepper. When the oven was ready, I turned it down to 450 and then let them cook for 45 minutes.

The aroma in my house was incredible. When I took these out of the oven, I had to prevent myself from taking a fork and eating them right then and there. I let these cool for about 20 minutes.

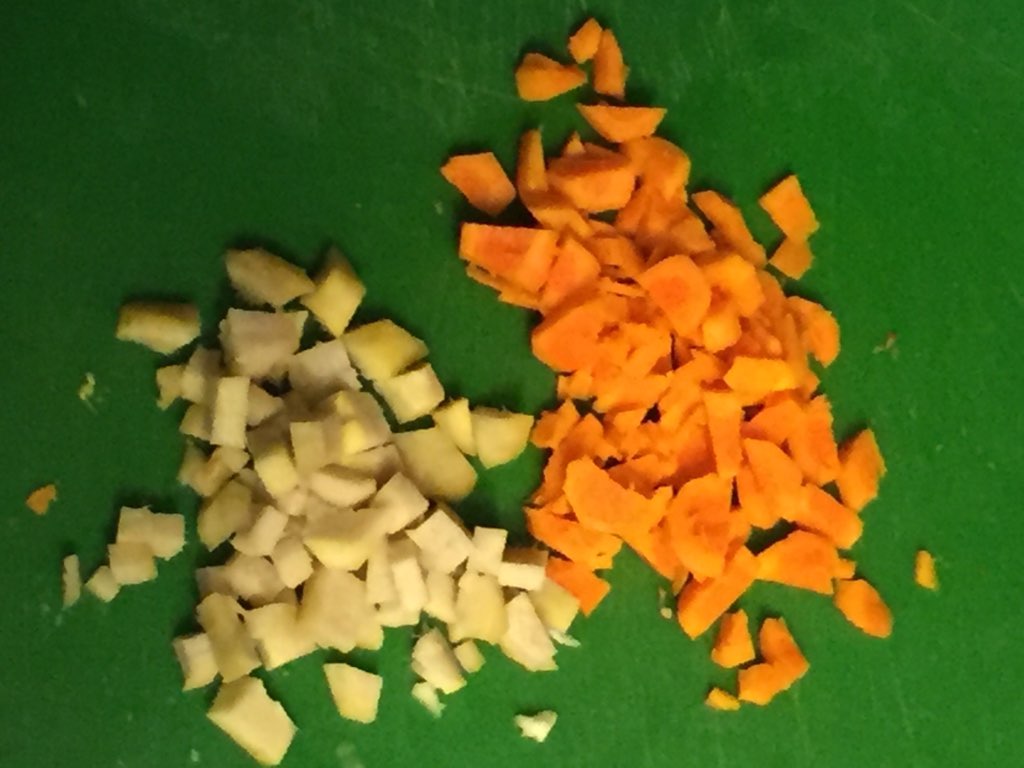
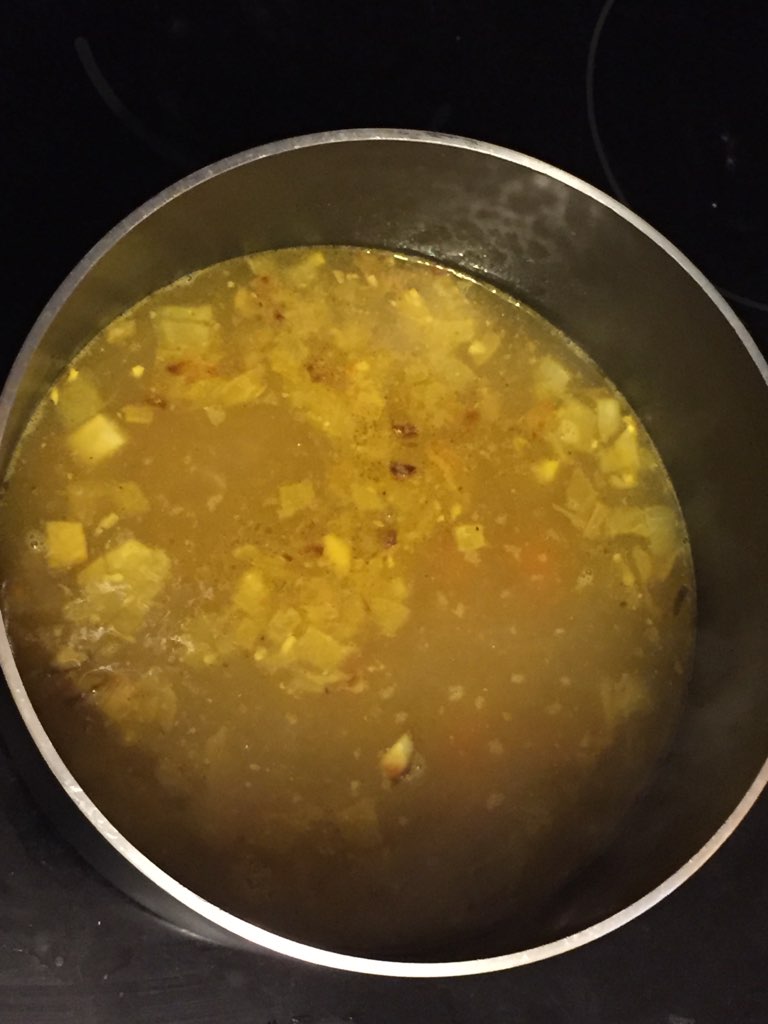
The next thing that I planned on making was some homemade marinara. I took about half of the roasted peppers and onions and finely diced them. Do not clean the roasting pan – it will be worth it to set it aside for later. I put the roasted peppers and onions in a pot with some olive oil (about one Tablespoon), and then started adding the rest of the ingredients for the marinara sauce, with the burner set at medium. I added one 30 ounce can of tomato sauce, plus half the can filled with water. This helped get the rest of the tomato sauce out. Next, I added one 14.5 ounce can of diced tomatoes, plus half the can filled with water. After that, I added one 6 ounce can of tomato paste and about one can filled with water (it takes more effort to get the extra bits of tomato paste out of the can). I stirred that all around for a bit, and then added some dried herbs and spices. I added 1/4 teaspoon marjoram, 1/4 teaspoon onion powder, 1/4 teaspoon garlic powder, 1/4 teaspoon black pepper, 1/4 teaspoon savory, 1/2 teaspoon oregano and 2 teaspoons of parsley.

I continue to stir until the first bubbles started coming to the surface. At this point I added in 1 Tablespoon of molasses and continued to stir until it came to a hard boil. I set the heat to low, loosely covered it with a lid, and continued to occasionally stir for the next 30 minutes. If I was going to be making pasta, I would let this cook for another hour or so, then I would let it cool, and then toss it in with the hot pasta.

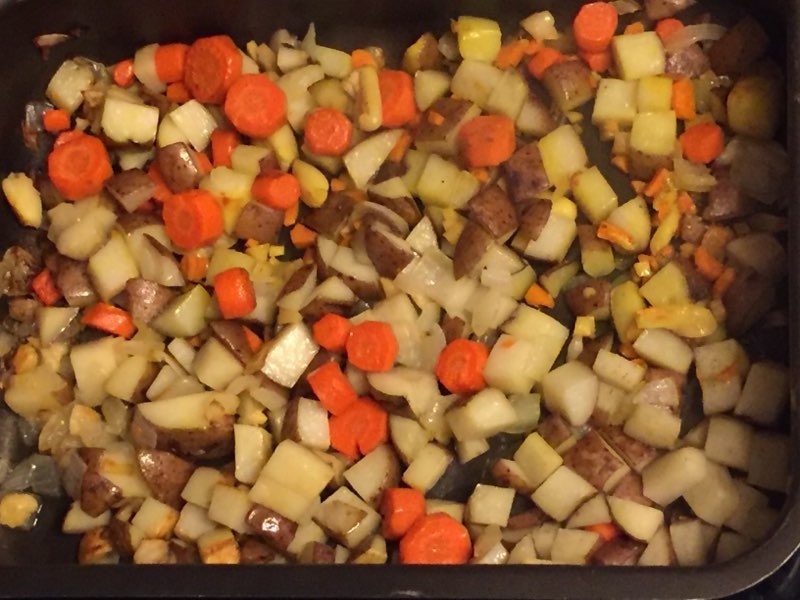
The next step was to make the meatballs. I started by setting the oven to 400 degrees. I took the rest of the roasted peppers and onions and chopped them up. Not as finely diced as the ones for the marinara sauce, but cut up enough to be bite sized.

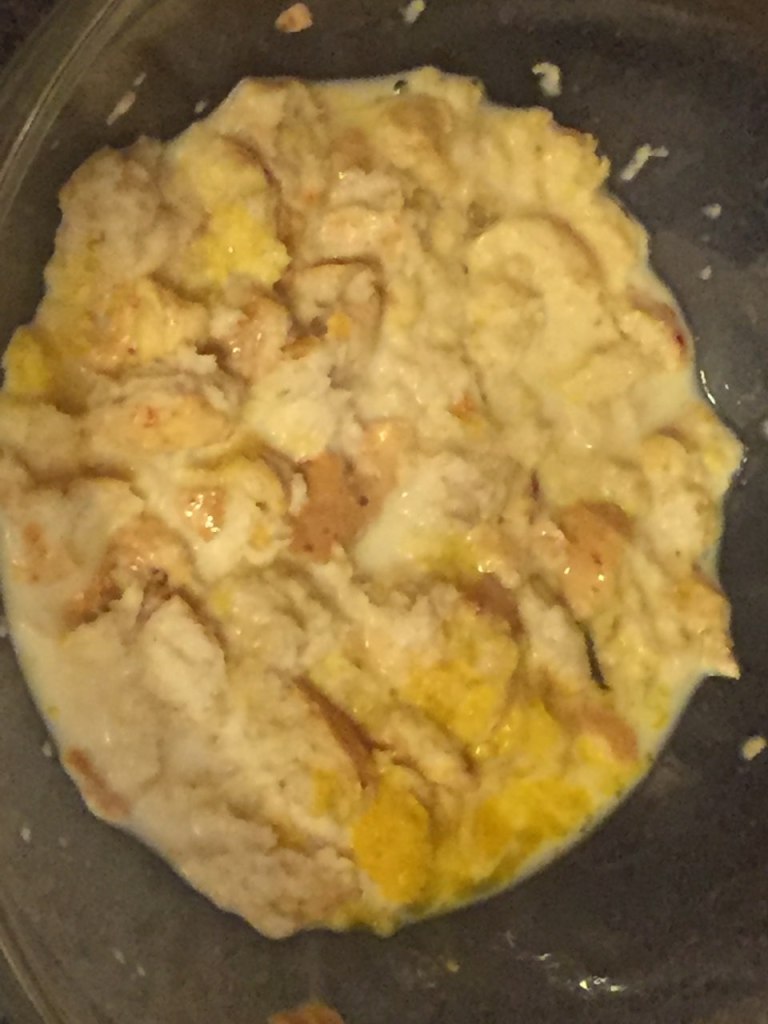
Next, I took one of the Cheddar Parmesan rolls I had purchased at The Breadery and ripped it up into little pieces. I added about 1/2 cup of milk and one egg and then mixed them all together. I could have used 1/2 cup of breadcrumbs, but I thought using the same roll I would be serving on would tie the flavors in well.

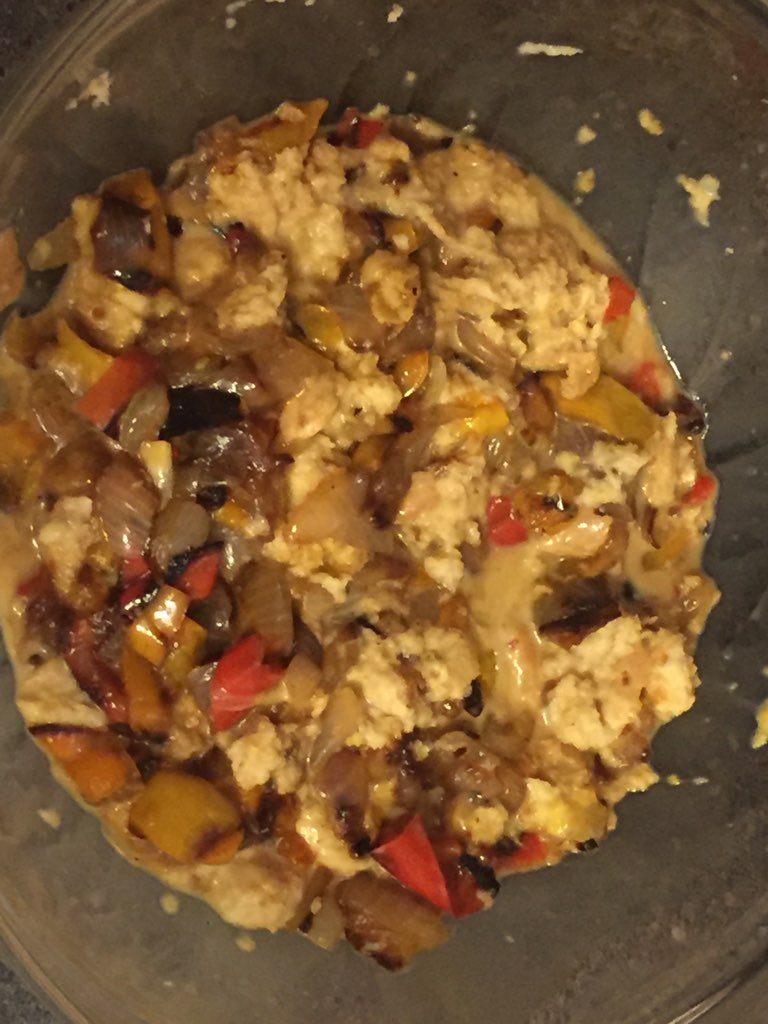
I then added in the roast veggies and continued to mix these all up. I did this by hand, but feel free to do whatever feels best for you.

Next, I added one pound of ground lamb and one pound of ground veal. You can use whatever meats work best for you, but I thought these two would make for a nice flavor combination. I added one teaspoon basil, one teaspoon rosemary, one teaspoon dill weed, one teaspoon crushed mint and one teaspoon anise seed. I then mixed all of these together until everything was just combined. I started from the outside of the bowl and folded it into the center, and continued doing that until everything was just blended.

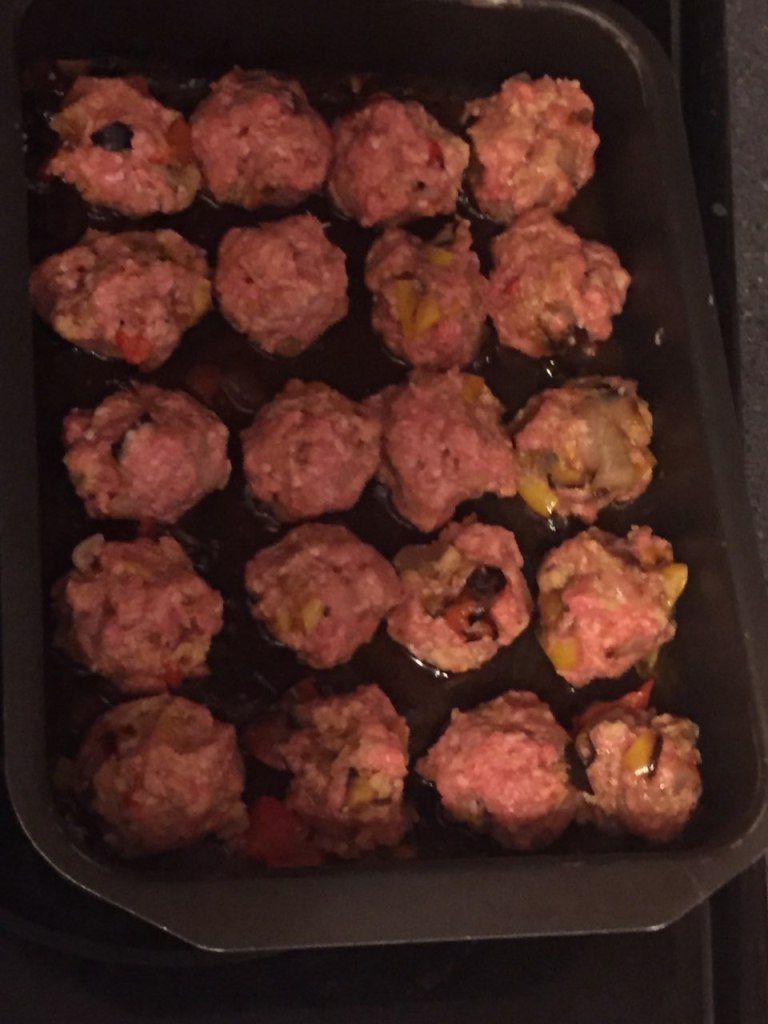
I placed about three spoonfuls of the marinara sauce in the roasting pan and mixed it all around, making sure to get the bits of roasted pieces still stuck to the pan. I then rolled the meat mixture into one inch round balls and placed them in the roasting pan. I only made 20 meatballs, but this could have made between 30-35. I made a mini meatloaf with the rest of the mixture – let me know if you are curious about that recipe as well.

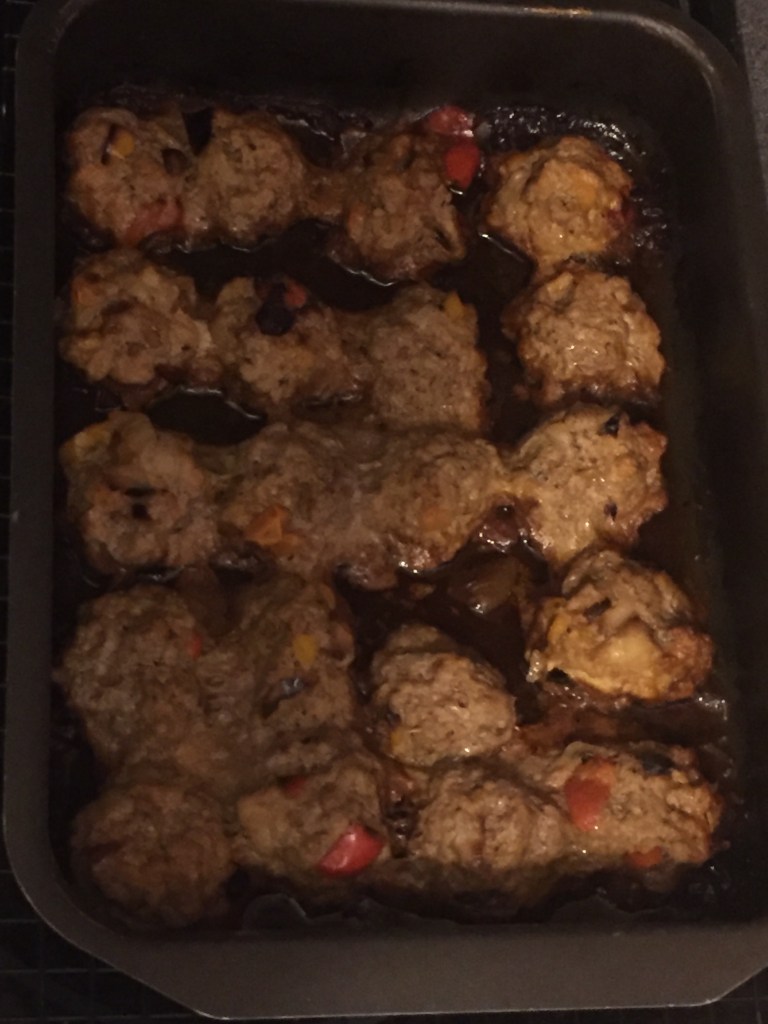
The meatballs cooked for 25 minutes, until they were at the proper temperature (160 for the meats I used today). Next came the assembly of the meatball sliders.

I heated up the Cheddar Parmesan rolls to give them a toasty exterior. I put in some shredded cheese and a little bit of marinara sauce, and then added the meatballs.

I have to admit that I wasn’t sure how this would all turn out, but these were the best meatball sliders I’ve ever had. I tried a meatball by itself, and it had really good flavor, but nothing that was over-the-top spectacular. The meats and roasted veggies worked really well together. But when I added the marinara sauce and the bread, the combination of those three things made my taste buds really happy. I don’t know if I’ll be able to replicate this again in the future, but at least I’ll be happy to be eating this for my next few meals during the week.

My weekend is not quite over, but this was a great way to end it and I was happy to get in some home cooking. It was easy to stay positive with my food tasting this good!

Crock Pot Corned Beef and Cabbage

I know it’s a couple of days early, but I decided to make myself some corned beef and cabbage today since I’ll be busy working on Tuesday. Even though I work from a home office, I prefer as few distractions as possible during the work week. I bought the corned beef last weekend and today was the day to cook it. My plan was to get the meat started, then go out to the grocery store and pick up some potatoes, cabbage, onions, and carrots to add later.

The meat that I picked up had already been brined and seasoned, which definitely made it easier for me. I put the meat (just under 2 pounds) in the crock pot and added about 4 1/2 cups of water. I added garlic powder, paprika, pepper, and coriander for seasonings, and also added a roughly chopped half onion that I had stored in my freezer. The meat was put in fat side up. I did not trim the fat prior to cooking. The water was just over an inch up from the bottom of the crock pot. It didn’t completely cover the meat, but it was more than half way covered.

I set the crock pot to low and then went on my way to the grocery store. My plan did not work out quite like I was hoping. The grocery stores have plenty of empty shelves. I was able to find some carrots and some cabbage, but the potatoes and onions were completely gone. Slim pickings, but I knew I could make do with what I had. At the 4 hour mark of the meat cooking, I added some roughly chopped carrots (1 pound bag) and roughly chopped cabbage (one head of cabbage). I kept it at low heat and let it go for another 3 1/2 hours, until the meat was to temperature. I waited until it was over 175, only because I was confident that it would not be too tough.

This picture does not look perfect, but I’m okay with that. The fat on top of the corned beef hides the color. The outside of the meat was not the bright red that I was used to seeing, which has me wondering if I did it right.

When I cut into it, against the grain, I saw that nice familiar red color. It looked a much brighter red than this picture is reflecting. This was not rare meat, the redness of the meat is due to the nitrates that are added during the brining process.

When I was ready to eat, I plated the corned beef and added some cabbage and carrots. The corned beef was very tender and delicious. It had the flavor my taste buds have become accustomed to, so I feel like I did a good job with this. The carrots were very tender and slightly sweet, which provided a good balance to the meat. The cabbage absorbed all of the flavors during the cooking process, and were very tender as well. This was definitely a good meal to make once a year and I look forward to having some leftovers on Saint Patrick’s Day.

Eating this well definitely kept me in a positive frame of mind. Not having additional onions or potatoes worked out better for me. All of that additional food would have made me feel even more stuffed. Stay well!

Homemade Sourdough Bierocks

For the past few years, I’ve tried to make foods that have components of both teams in the Super Bowl. This year’s teams are San Francisco and Kansas City. I could have gone the easy way and had a steak sandwich on sourdough bread, but I wanted to try something a little bit different. Something that would let me test my cooking skills. I saw that the Kansas City regions (both Kansas and Missouri) have something called bierocks as a popular local dish. They are a yeast dough pastry pocket sandwich filled with savory foods.

Since this was a bread dish, I thought that sourdough would be a good match, since sourdough bread is one of those things I think about when it comes to San Francisco. I looked for raw sourdough bread, but was not able to find any in the grocery stores, so I decided to make my own sourdough starter, which I wrote about yesterday.

One of the tough things with sourdough bread is that it can have a very hard crust. I didn’t think a hard crust would be a good fit for the bierocks, so I had to make adjustments.

Last night, I mixed up 2 cups of my sourdough starter, 3 cups of flour, 1 1/4 cups of water and a pinch of salt. It was a better consistency than my first effort, and I covered it loosely and let it sit on a cookie sheet over night.

I thought about the timing of the food and how it would best be prepared. I had to make the filling and provide it with enough time to cool, so that was the next thing I worked on.

INGREDIENTS

1 pound ground beef

1/2 head cabbage

1/2 large white onion

dash of salt

dash of pepper

Step one was to chop 1/2 head of cabbage and 1/2 of a large white onion.

Next, I browned the ground beef. I used an 85/15 split, so there was some fat but not too much. I added the salt and pepper right before it was all browned.

Next, I added the chopped cabbage and onion and reduced the heat to medium low. I covered with a lid and cooked for 25 minutes, stirring every couple of minutes.

I took off the lid, turned the heat up to medium, and cooked for another five minutes. I then set it aside to let it cool. I tried a couple of bites, and it tasted much better than expected.

While the mixture was cooling, it was time to turn my attention to the sourdough. After about 15 hours of sitting, it expanded and got flat. I put some flour on a wooden board and worked the dough a bit.

I could have stopped here and made a bread bowl, but I wanted to make those bierocks. I rolled the dough until it was about two inches around, and then took off two inch portions and made round balls.

They didn’t keep their shape, but that was okay. This batch made 19 dough balls. I let those sit for about 15 minutes, which also gave the filling more time to cool. I didn’t want the filling to be too hot, since it was going to be surrounded by dough.

It was now time to make these stuffed sandwiches. I flattened out the dough balls.

Next, I added in a spoonful of filling.

I sealed it up at the top, and then I rolled it around in my hands to be more rounded.

This is one of the trays. They didn’t keep a round shape, but they still looked good. There were a couple of spots where there was too much filling and it tore through the dough, but I wasn’t looking for perfection. The meat mixture was about twice as much as I needed. I don’t mind the leftovers, since I can use them in the next few days. I preheated the oven to 350 degrees. I did this to let the dough have some more time to rest before getting baked.

I cooked them for 15 minutes, rotated, and then another 16 minutes, and they were done.

It was now time to eat. I know that I made this well before the Super Bowl started, but there was no way I could wait until 6:30 PM to eat food. And prep time would take away from watching the game (and the commercials). Biting into this stuffed sandwich was pretty nice. The top was easy to bite through and was not crunchy like a normal sourdough bread. The bottom was a little more crisp, but still easy to bite through. I think this would be better with the traditional dough, which would be softer and a little more sweet, but this was still good.

The meat mixture had some good flavor to it. I’m not always a big fan of cabbage, but it had a nice consistency to it and it absorbed the flavors of the meat and onions really well. I had one bite that was just cabbage, and it had a velvety consistency and a smooth flavor that pleasantly surprised me. I really enjoyed this meal. It would have been better to have people to share it with, but at least I already have my lunch and dinners prepared for the next week. It’s easy to stay positive when the food you spend time to prepare works out. No matter what happens in the Super Bowl, this has been a great day. Enjoy!

Homemade Sourdough Bread (Including Starter)

This has been a fun week for me. In preparation for some food that I want to make tomorrow, I decided that I would try my hand at making fresh sourdough bread. This is mainly because I could not find any raw sourdough bread in the grocery stores, so this ended up working out for me. I tried to find if there was a standard recipe for a starter, but there are many variations (some called for a thinner starter, some called for a thicker starter). Some required very precise measurements. When I cook, I am not usually precise, but when I bake, I try to be precise with the main ingredients. Since there were so many variations, I tried to do my best and see what happened.

I started this on Sunday, since most recipes said it would take about 5 or 6 days for the starter to be ready. I used just over 3/4 cups of flour and 1/2 cup of water. Mixed it up, put it in a bowl and loosely covered it with plastic wrap. It seemed to be a bit thick, but I didn’t want to overthink things.

Monday night came and I was ready for phase two. It had set for 24 hours and did not look as thick. There was a little moisture around the outside edges, so my first thought was that I didn’t mix it all the way, but I think this was more just the natural process.

It was feeding time, so I mixed in the same amounts of flour and water as the first day, covered loosely with plastic wrap and let it be.

Tuesday night arrived, and it was looking a little thinner, but there weren’t any bubbles or anything. This is when I was starting to question if I had done it right. Even though the recipes said it could take a couple of days to start seeing bubbles, I had doubt. The recipes also said it should be kept at a temperature of 70-75 degrees. I keep my house between 60-65, and I had it in a glass bowl, which felt even colder. So I was questioning whether or not this would work.

I did another feeding, and had my fingers crossed that something – anything – would happen.

Wednesday evening came along and I was happy. There were a couple of bubbles in there. Not many, but at least some. I had some optimism. It didn’t taste any different, though (I took little tastes every night, just because I’m weird like that).

It was time to feed it again. I had not factored in all of the days I would be adding flour and water, so the original bowl I started with got to be too small. I had to upgrade to a larger bowl (which happened to be plastic). Loosely covered it, and let it go.

Thursday night arrived and I was happy with what I saw. There were quite a few bubbles, and it started to have an “aroma” to it.

I did my evening feeding and let it be for another day.

Friday night came and then came the words. “Feed me, Seymour!”. This was really odd, since my name is not Seymour, and I did not name this Audrey II. For those of you who get the reference, thank you for rolling your eyes. For those of you who did not get the reference, you can roll your eyes later. The aroma had definitely become more distinct. I now understood why they call it sourdough.

I wanted to try to do a test run on Saturday, so I decided to take some of the starter aside. I fed the starter base and let it sit.

I took out one cup of the starter.

I added 2 cups of flour, 1 cup of water and a pinch of salt. I mixed it all together, put a light layer of oil on the top, covered it loosely with plastic wrap, and let it stay in the bowl to sit overnight. It was still a bit sticky, which I think was a mistake on my part.

When I woke up in the morning, there was not much of a change to the dough. I added a little flour to it and turned the oven on to 400.

I put a little bit of flour on a baking sheet and placed the bread on top of it. I then gave it an “X” on the top. There was still another 10 minutes before the oven was ready, and it started to rise a little within that time. That let me know I messed up with how I put this all together. No matter, I put it in the oven for about 45 minutes.

The house had a nice sourdough bread smell to it, so I was a happy camper. I checked the temperature with a thermometer (it should be around 210 in the center), and it was ready to cool.

I learned quite a few things with this test run. I should have made the dough a better consistency. It was too sticky, which meant it needed more flour. I think that the additional flour might have helped with the rising. I’m no food scientist, so I could be wrong. Once I had it at the right consistency, I should have given it more time to rise. I also should have baked it on parchment paper or used some cooking spray. It stuck to the pan in a couple of places, and it was not fun when it was time to clean the pan.

As far as the flavor goes, I was happy. The outer crust was hard, but not overly chewy, which is one of the things I don’t really like about sourdough bread. The inner part of the bread had the familiar flavor. Biting into it reminded me of the flavors that I’m used to. It was a bit dense, but that was probably because I did not let it rise properly.

So what I have is a gassy, dense sourdough starter and sourdough bread. Gassy and Dense – just like its dad. Awww. I’m glad that this first batch did not turn out perfectly. I got some of the basics down, but I need to learn. I’ve made different types of bread before and they all worked out. This will just take me some more practice. Trying and failing is better than not trying and regretting. Stay positive!

Slow Cooked Baby Back Ribs

This past Friday, I received an email from one of the grocery stores I frequent, Harris Teeter. There was a weekend only special: buy 1 rack of baby back ribs, get 2 free. That is a deal that is just too good to pass up. As soon as I finished work on Friday, I made my way to the grocery store. There were only three left when I got there, so I really lucked out. I would have considered waiting until Saturday morning, but we were expecting some snow and ice, so I figured I’d play it safe. It’s a good thing, too. We didn’t get too much snow, but we got a lot of rain, which turned to ice very quickly. My car was iced over, so I would not have been able to go anywhere.

I don’t remember exactly when I got this BBQ Pit Crock Pot, but I am glad that I did. I don’t believe they make these any more, which is a shame. I Haven’t used it since I moved back to Maryland 4 1/2 years ago, so it was long overdue for some usage.

I decided that I would be doing a dry rub for the ribs. I started by putting a mixture of apple juice and orange juice on the bottom of the pot. I then used some of my dry rub mix on the ribs.

1/4 cup sugar

1/4 cup brown sugar

1 Tablespoon paprika

1 teaspoon black pepper

1 teaspoon chili powder

2 teaspoons rubbed sage

1/2 teaspoon turmeric power

1 teaspoon garlic powder

1/2 teaspoon cayenne pepper

1/2 teaspoon rosemary

1/4 teaspoon citric acid

I’ve used this before and it’s worked out quite well. There’s no salt in there, so this makes a good low sodium meal.

The slabs were a bit too big for the pit, so I had to trim them in order to get them all in the crock pot. I woke up early, so I was able to get this started on low heat right around 5:30 AM.

Although it was probably ready sooner, I didn’t touch it until 2:30 PM. I confirmed the temperature of the meat was at least 170, and it was good to go.

It took a little maneuvering to get them out of the pit, but they looked great to me.

They were nice and tender and had some really good flavor to them. I had some rice and some sauces for dipping, although I also liked eating them as they were.

I’m not always a fan of ribs, but I usually enjoy baby back ribs. They tend to have meat that is easier to get to and easier to bite through. These slabs were “extra meaty”, and it was true. I ended up eating more than I should have, but still have plenty of leftovers that will get me through the week. Now that I’m working from a home office full time during the week, these will provide a quick and easy meal when I need to take a short lunch break.

I’m glad that I was able to use my BBQ Pit Crock Pot again. It’s been too long since I last used it. I will probably use it once or twice a year, but it’s definitely worth having for weekends like this. Clean-up may be a bit rough, but the flavor and ease of cooking makes it worth it. Having my food taste even better than expected sure made it easy to stay positive!

Roasted Vegetable Soup

I made this soup yesterday. There are a few different components to it, and they all worked really well together.

INGREDIENTS

3 medium carrots

5 red potatoes

1/2 onion

8 cloves garlic

2 Tablespoons fresh ginger

2 Tablespoons fresh turmeric

2 Tablespoons Olive oil

2 Tablespoons Sesame oil

Ground Pepper

5 cups broth

2 1/2 cups water

OPTIONAL INGREDIENTS

2 pinches Citric acid

1 package udon noodles

PEANUT BUTTER SAUCE (Ingredients below)

1/3 cups creamy peanut butter

1 Tablespoon vinegar

1 Tablespoon Teriyaki sauce

1/2 Tablespoon hot sauce

I had some home made chicken broth on hand, but broth from a store will also work. It doesn’t have to be chicken broth, just a broth of your choosing.

The first step is to preheat the oven to 400 degrees. I chopped up the carrots, potatoes, and onions. I also chopped the garlic. I smashed once to remove the skin, and then smashed again to have it broken down into large chunks. If you would prefer minced or chopped up, that will also work.

Coat the bottom of the roasting pan with olive oil. Add the carrots, potatoes, onions and garlic. Swish it around to get as many pieces coated as possible. Ground some pepper and swish it around again. Place in oven and bake for 15 minutes.

While the veggies are roasting, cut up the ginger and turmeric. If you prefer to have them minced of finely chopped, that will work. I enjoy the flavor of biting into fresh ginger, but it’s not for everyone. When the 15 minutes of baking are done, take out the vegetables. Add the ginger and Turmeric, and then drizzle with the Sesame oil. Swish around and continue to bake for another 15 minutes.

Once the vegetables are ready, you can remove them from the oven. Let them rest about 5 minutes. The carrots and potatoes should have a slight firmness on the outside and should be soft on the inside.

Place the roasted vegetables into a large pot. Take 1 cup of the broth and add it to the roasting pan. Using a spoon or spatula, try to scrape up any bits of flavor that may have been left on the roasting pan. Pour it into the pot, then add the rest of the broth and the water. If you are cooking with low sodium, you can add in the pinches of citric acid. Cook on medium heat until it comes to a slow boil. If you want a basic vegetable soup, it would be ready at this point. If you want to add things to it, then you can start adding them in. I added a couple of different things to this soup.

The first thing I added was a peanut butter sauce. In a small bowl, combine the peanut butter, vinegar (I used distilled white, but rice wine would also work), Teriyaki sauce and an optional hot sauce of your choice. Once these are all combined, they can be added to the soup.

I also had a package of udon noodles. Cut them into cubes, so the pieces will be much smaller when cooked. After the peanut sauce is incorporated, let the soup get back up to a slow boil, and then add the noodles.

Once the udon noodles are added to the soup, it should cook for another 5 minutes. The cubes should be broken apart by that point. The soup will still be thin, but the color will change after the peanut butter sauce is added.

Once the noodles have been incorporated, the soup is ready to be served. The flavors of this soup really go well. The peanut butter sauce provides a nice kick to the soup, and it also has a nice balance with the noodles. There are bites of ginger, turmeric, and garlic that add a punch of flavor and freshness to the soup. The roasting of the vegetables help to add a bit of a deeper flavor than if they were boiled, and the outsides of the carrots and potatoes have a nice textural bite to them.

This soup put me in a happy place, and I look forward to eating more as the weather continues to get colder. Enjoy!

Homemade Chicken Curry

Yesterday, I managed to make good use of the leftover chicken from the Roast Chicken I had made on Sunday.

I made chicken curry. There were a couple of extra steps that I added, and I think that they worked for me. I didn’t do strict measurements for everything, so some of the measurements listed are going to be rough estimates.

INGREDIENTS, Part I (roast cashews):

1 cup raw unsalted cashews for roasting

INGREDIENTS, Part II (cashew curry paste):

1 cup raw unsalted cashews

1 piece of fresh ginger, roughly 2 inches long, roughly cut

1 piece of fresh turmeric, roughly 3 inches long, roughly cut

3 cloves of garlic, roughly cut

1/4 cup evaporated milk

1 teaspoon curry powder

INGREDIENTS, Part III (curry):

4 medium size carrots, cut into chunks

5 red potatoes, cut into small chunks

2 pieces of fresh turmeric, finely chopped

5 cloves of garlic, minced

2 pieces of fresh ginger, finely chopped

1 large onion, diced

1/2 stick of butter

2 Tablespoons olive oil

3 cups of chicken broth

12 ounce can of evaporated milk, minus 1/4 cup (for cashew curry paste)

3-4 cups of boiling water

1 Tablespoon plus one teaspoon curry powder

1 teaspoon ginger powder

1/2 roast chicken (cooked)

The first thing I did was roast the cashews. I preheated the oven to 350 degrees. I put one cup of cashews on a tray lined with aluminum foil and sprayed with cooking spray (I don’t think it really needs the cooking spray). Depending on your oven, this should take 10-15 minutes. Make sure to keep an eye on it, since you don’t want these to burn. Remove from the oven and set aside. Once these are cooled, place in a storage bag and run a rolling pin over them. This is what I used for a topping.

The next step was the paste. I put in the cashews, ginger, turmeric, garlic, curry powder, and evaporated milk into a blender and then blended until it got to a nice, thick consistency. If you want a spicier curry, feel free to add something that will give more heat to this mixture (more curry powder, more ginger powder, black pepper, cayenne pepper, hot sauce, etc.). Regarding the evaporated milk, I bought a 12 ounce can and used 1/4 cup in this mixture and saved the rest for later.

The next step is to prep the veggies. I cut the carrots, potatoes, ginger, turmeric and garlic and set aside in a bowl.

Start cooking the onions, butter and oil on medium-high heat.

Stir often. Once the onions are translucent, you are ready for the next step.

Add in the curry paste mixture and start stirring until it is all incorporated.

Add in the veggie mixture, 1 Tablespoon curry powder, ginger powder, and the broth. Continue to stir until it is well incorporated, and then add in the rest of the can of condensed milk.

Bring this to a slow boil and then add in the water. If you prefer a thicker sauce, you can start with 1-2 cups and keep adding later until the desired consistency. Bring this to a boil again and then let it boil for 30 minutes, stirring often.

Stir in one teaspoon of curry and then add the chicken. Bring the temperature down to medium heat and cook for another 30-60 minutes, until the curry is the desired consistency. I waited about 10 minutes after I added the chicken and then started cooking the rice.

Once the rice and the curry are ready, you can plate your food. I prefer my sauce to be a little thinner on the first day, since it tends to thicken with time. I also like to have my curry over my rice, but if you prefer them side by side, then do that. I topped it with the rough chopped roasted cashews. You can have peanuts, hard boiled eggs, bacon, chutney, pickled veggies, hot sauce, etc. Whatever makes it unique to your tastebuds, I say go for it. I really enjoyed making this and eating this yesterday, and looking forward to eating the leftovers. A very positive Monday for me!

If you’ve eaten or made curry before, what types of veggies have you put in there? What kinds of toppings have you added? I’d be happy to hear from you.

Roast Chicken

There are times that I have a couple of meals planned out, so I start to buy the ingredients and think about how I can use them for a couple of meals. I did this yesterday and made a pretty good roast chicken.

INGREDIENTS

1 whole chicken – 5-6 pounds

1/2 onion, cut into rings

2 carrots, coarsely chopped

3 red potatoes, coarsely chopped

1 Tablespoon Poultry Seasoning

1 teaspoon black pepper

1 teaspoon Pink Himalayan sea salt

1 teaspoon garlic powder

1 teaspoon onion powder

1/4 cup orange juice

I preheated the oven to 300 degrees. I wanted this to cook at a lower temperature for a longer period of time.

I started off by chopping the vegetables. I then placed them in a roasting pan that was lined with aluminum foil. I positioned the vegetables so that the chicken could rest on top of the onions, while the potatoes and carrots would be in the surrounding area.

The seasonings and orange juice are all rough estimates. After removing the bag of giblets, I made sure to rinse and pat the chicken dry before placing on top of the onions. I then poured over the orange juice, making sure it got on the back and front of the bird. I put the seasonings into a small bowl and mixed them up. I then put rubbed them into the back, the front, the inside cavity and a little under the skin.

I baked the chicken for about three and a half hours. The meat was fall off the bones tender, juicy, and full of flavor. The skin was nice and crispy, with a robust flavor from all the seasonings. The potatoes and carrots were soft and pleasant tasting. The onions were really sweet and rounded out the meal very well.

I made two different broths from this chicken. The first broth was made using the giblets from the bag. I boiled those on medium-high heat in about 3 cups of water, with some diced fresh ginger, diced fresh garlic and diced fresh turmeric added. Once this got to a boil, I let it boil for 20 minutes and then turned the temperature down to medium-low heat. I let this continue for another 30 minutes and then it was ready to save.

The second broth was made after the meal was over. I removed the meat from the bones and set aside for a separate dish. I used a pasta pot, since it has a strainer. I put the bones in the strainer and then added water until it was covering all the bones. I boiled this on medium-high heat. Once this got to a boil, I let it boil for 30 minutes and then turned the temperature down to medium-low heat. I let this continue for another hour and then it was ready to save. Since this had flavor from the chicken bones (with some skin and seasoning still in tact), I did not feel the need to add anything else to the broth. I saved some of the broth in the refrigerator, and put the rest in storage bags in the freezer. These will provide me with some quick broth for a future meal.

The flavor of the chicken was much better than I was expecting, and I was very happy with how tender the meat was. It was an easy way to keep me staying positive!

Cashew Curry Cookies

I’ve made these cookies a couple of times. The batch I made yesterday included a lot more butter (1 stick more) than usual, but I think that it worked well and I wanted to share.

Ingredients:

1/4 cup powdered sugar

2 1/2 sticks (20 Tablespoons) softened butter

1 1/2 Tablespoons sugar

1/4 teaspoon salt

1 1/4 cups flour

1/4 cup corn starch

2 teaspoons curry powder

1 cup roughly chopped cashews (unsalted, raw is preferred)

Preheat the oven to 300. Mix the powdered sugar, butter, sugar and salt until the mixture is creamed and fluffy. Sift in the flour, corn starch and curry powder. Knead together in the bowl until a ball of dough forms. FYI, this is going to be a very sticky dough. If the dough is dry, add a couple of drops of water until all of the dry mixture is incorporated. Add in the chopped cashews and mix together (I put whole, raw, unsalted cashews in a lightly sealed bag and use a rolling pin to get it to be a rough chop). Place by spoonfuls onto a cookie sheet (I line mine with parchment paper).

When they are all on the cookie sheet, you can form them or make them into shapes if you would like. Bake for approximately 45-50 minutes, rotating once halfway through.

There should be a nice brown coating along the bottom edges of the cookies.

This cookie is very rich and flavorful. You have the rich buttery flavor, the subtle curry flavor, and the smooth flavor of the cashews, with a little bit of a crunch. The cookies will break apart easily, but they almost melt in your mouth. Even though this has 2 teaspoons of curry powder, it’s not an overbearing flavor. This is a sweet cookie with hints of savory. Since it breaks apart, the cashews help hold it together, and they also add a nice combination of flavor with the curry.

I’ve made the South American version of Alfajores before, and the corn starch and flour combination give those cookies their texture. That is the reason I wanted to have some corn starch in these cookies. If you would prefer to do without, just make sure to adjust the recipe and add an additional 1/4 cup flour instead of the corn starch.

I had two bonuses with this batch. The first was the parchment paper after the cookies were removed. There were little brown butter crumbs which had an extra layer of flavor. The other bonus was the aroma. I enjoy the smell of curry, and it was all over the house. And when you are getting ready to bite into these cookies, the slight smell of curry goes into the nose and invites an extra layer of sensory enjoyment. It’s easy to stay positive when eating these!

Homemade Pierogi

I still had some leftover malanga, and I had it in my head to try and make a variation of pierogi that used mashed malanga instead of potatoes. There are three separate components that are part of this recipe: caramelized onions, mashed malanga, and the dough and pierogi. The caramelized onions and mashed malanga are good independent of this dish, but work well together for this. I am going to share how I put this together.

I will start with the caramelized onions, then move on to the malanga, and then move on to the pierogi. If timed well, the dough can be the first thing made, then the onions and mashed vegetable, and then the pierogi. There is a good flow when putting it together, but I’ll focus on the separate recipes.

CARAMELIZED ONIONS

1 medium size yellow onion, chopped

1 Tablespoon butter

1 Tablespoon olive oil

Pinch of salt (optional)

Pinch of sugar (optional)

1/4 cup of water (optional)

Place the butter and oil in a large saucepan over medium high heat. Once the butter has melted and the mixture has some foamy bubbling, add the chopped onion and turn the heat down to medium.

Make sure the onion is layered evenly on the bottom of the pan. Stir every 2-3 minutes. The entire process should take between 30-50 minutes.

When the onion starts to get a little brown, add the dash of salt if desired. Continue to stir every 2-3 minutes.

Once the onions have gotten a deeper brown, you can add 1/8 cup of water and a dash of sugar if desired and turn heat to medium low. Continue to stir every 2-3 minutes. The stirring should allow for enough time for the onion to brown without burning or sticking to the bottom of the pan.

Once the onions have some really nice caramelization going, add a little more water to prevent burning. After another 2-3 minutes, the onions should be done and ready to be removed from the stove.

MASHED MALANGA

1 1/2 pounds malanga, chopped

1/4 cup softened butter

1/4 – 1/2 cup milk

1 teaspoon garlic powder (optional)

1 teaspoon onion powder (optional)

1/8 teaspoon pepper (optional)

2 teaspoons paprika (optional)

1 cup shredded cheese (optional)

Malanga is a very hard root, so be very careful when cutting. Remove the outer skin and cut the malanga into pieces. Rinse well. Put into a pot and fill water so that it is about 1 inch above pieces. Bring to a boil and let it continue to boil for about 15 minutes. When the largest pieces of malanga fall off a fork with ease, the malanga should be ready (should be similar to boiling potatoes). Drain water and put malanga back in pan.

Add in butter, milk and any seasonings you would like and then mash until it gets to the consistency of mashed potatoes.

For the next step, I added in about 2/3 of the caramelized onions (leaving the rest for something else, possibly a patty melt). I let the mixture get to room temperature and then added in the cheese. I did not want the cheese to melt yet, but if you would prefer to have melted cheese, then you should do it. I preferred to have the cheese intact because I didn’t want to have to deal with the melty cheese when trying to scoop it into the dough (coming later). If you didn’t want to make pierogis, this would still be an outstanding dish as is. The caramelized onions really take this to another level. I heated some up later and my opinion is that it was absolutely delicious. If you are going to be making the pierogi, then this mixture should be at room temperature when the dough is ready.

PIEROGI DOUGH

2 cups flour

1/2 teaspoon salt

1 large egg

1/2 cup sour cream

1/4 cup softened butter

Mix together the flour and salt. Add the egg and mix together. It will be mostly flour, with a few lumps. Add in the sour cream and softened butter. I started this with a fork, to make sure the butter gets properly incorporated. Once the butter was broken down and blended in, I used my hands. Work the dough with your hands until it is able to hold together in a ball. If the dough is too sticky, add a little flour. If it’s too dry, add a little sour cream.

Once the dough is able to be formed into a ball, cover it in plastic wrap and place in the refrigerator. This should be refrigerated for no less than 30 minutes, but can be kept for up to 2 days.

Once you are ready to make the pierogis, remove the dough from the refrigerator and roll out 1/2 of the dough until it’s a little more than 1/8 inch thick.

If you want, you can roll the dough to be 1/8 inch thick and then use a two inch round cutter. I rolled the dough until it was slightly thicker than 1/8 inch, and then used a shot glass to cut the dough.

I then took each shell and rolled them a little more to get them flat.

Next, add about 1/2 teaspoon of the mashed malanga mixture into the center of the shell.

Fold the shell over and pinch the edges together.

Use a fork to seal it again. If a little bit of the filling sticks out, that’s okay.

Once you have the first half of dough complete, you can start working on the second half. This should yield 3 – 4 dozen pierogi.

Boil a large pot of water and add in salt. Place the pierogi in the boiling water. Make sure there is enough space that they don’t overlap (otherwise, they might stick together).

These should take 5-10 minutes to cook. They will float to the top when they are ready. I took them out as soon as they started to do a little dance.

They are now ready to enjoy. I had sour cream as a side for my first batch and butter for my second. The flavor is really good, so I prefer that it is not masked with anything overpowering, but that is my personal choice. The flavors all came together really well in this batch. It tasted a lot better than what I was expecting, so it was a nice surprise.

If you don’t want to cook the pierogi all at once, you can refrigerate the uncooked pierogi for another day, or you can freeze for a few weeks and then take out and boil when desired. If you didn’t use all the dough, you can always set it aside for another day and make something else (maybe cut them up and cook them in a nice broth based soup during the cold Fall and Winter months).

These can be filled with different things. I chose my ingredients because they fit the flavor profile I was craving. Some might prefer sauerkraut. Some might want the onions to be used as a topping instead of as part of the filling. There are many options out there. Just choose what works best for you.

I hope you enjoyed this recipe. Any feedback or thoughts are happily appreciated.

Stay Positive!