Rice, Veggies, and Chicken Dish

As you may have figured out by now, I truly enjoy food. I go to different places and try different foods. I also like cooking and preparing my own meals from time to time. Today was one of those days. I had an idea for what I wanted to make, but it was a matter of getting some special ingredients and having a good block of time to be creative.

Here are the Ingredients for today’s dish:

1 1/2 lbs malanga

1 lb sugar snap peas

8 ounce can – diced water chestnuts

1 pound ground chicken

1 1/2 cups rice

3/4 cup multi-grain

6 cups water

1/4 teaspoon allspice

1/8 tsp cumin

1/8 tsp nutmeg

1/8 tsp cardamom

1/4 tsp dried marjoram

1/4 tsp dried rosemary

3 Tablespoons Sesame oil

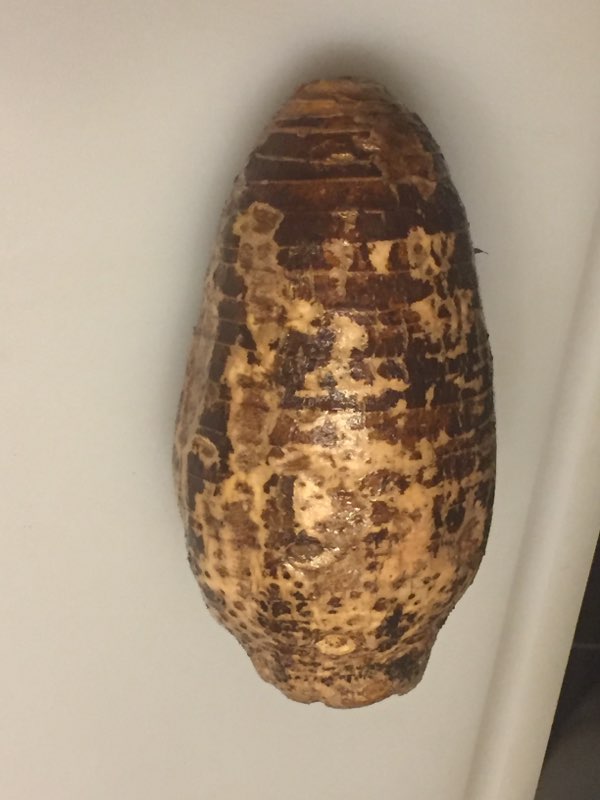
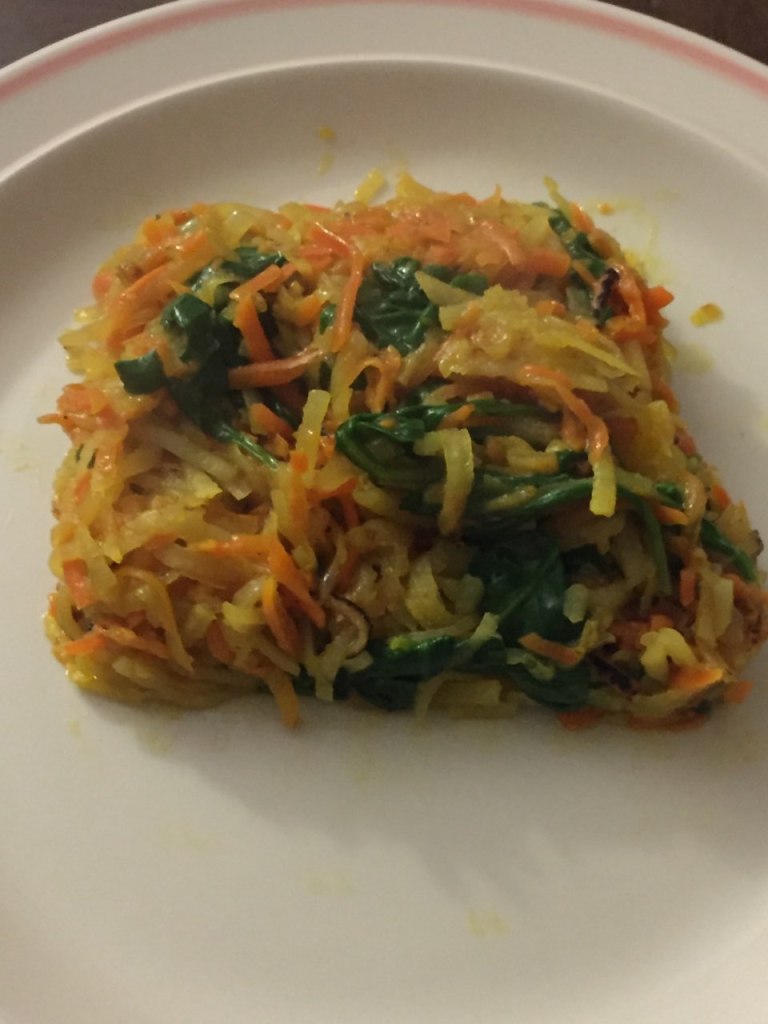
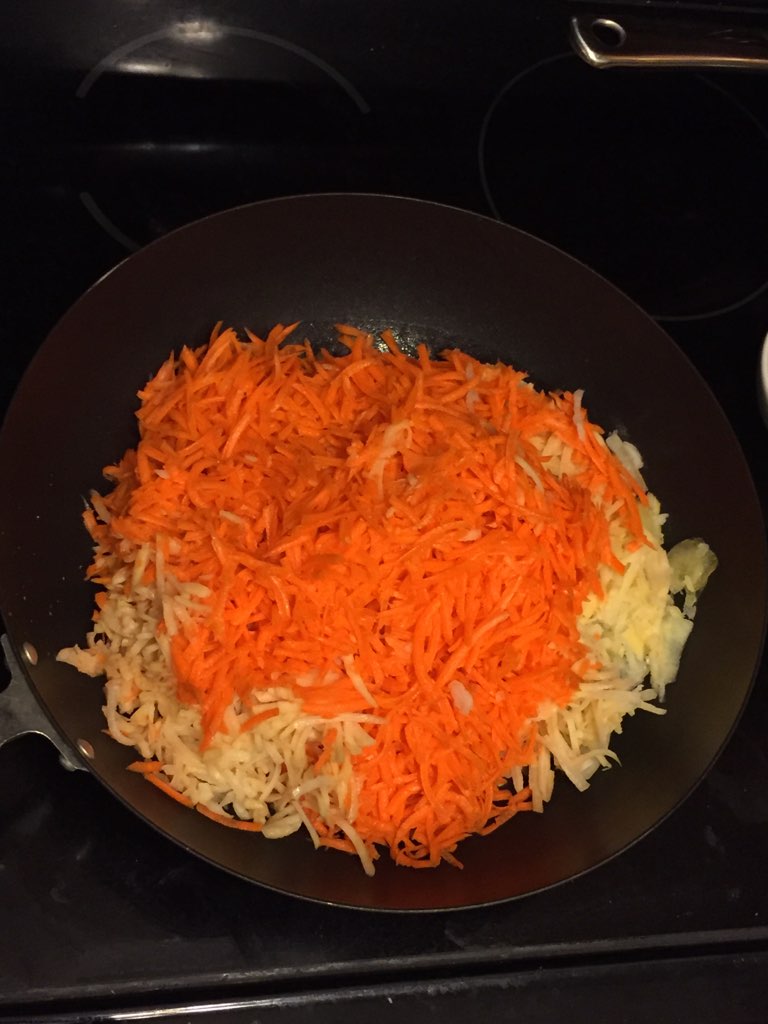
There was a nice flow to the preparation of this dish. Malanga is a root vegetable that is similar to taro. The cooked flavor is similar to a potato (I think it’s in between a potato and sweet potato). This is a very difficult vegetable to cut, so please use caution when cutting. I cooked the malanga with the rice, so I wanted to make sure it was cut up in bite-sized pieces to make sure it would cook properly in the rice cooker. Rinse before you start cutting, make sure the outer skin is removed, and then rinse again after the malanga has been cut into bite sized pieces.

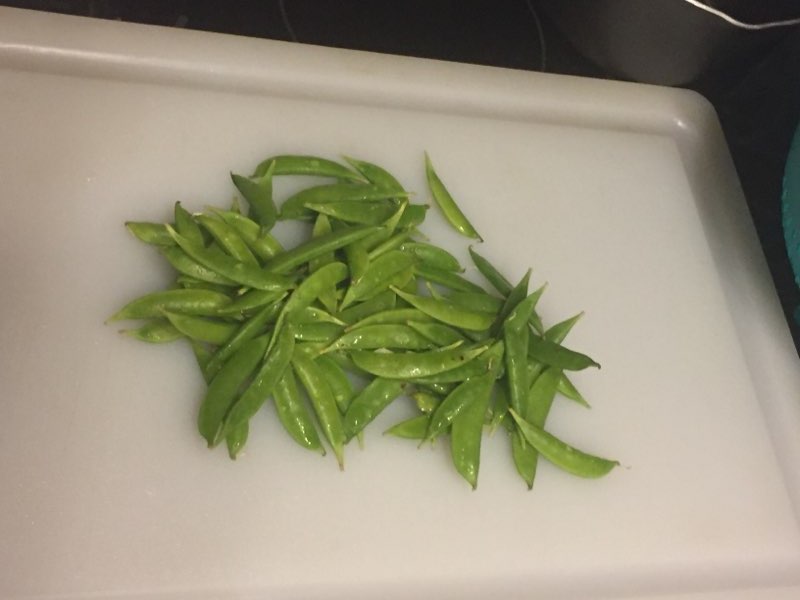
The next bit of prep work was for the sugar snap peas. These took a bit longer than expected, so I’m glad I did them first. I rinsed the peas first. Next came the preparation. You need to take off the ends and slide them along to remove the membranous string. This is the part that takes the longest. Once the preparation is complete, rinse again.

Next is the cooking of the rice. I added the rice and the multi grain mix (the picture is the one I like to use). I then added the water and swirled it all around. I put in the cut up malanga and then swirled the water around again. I set the rice cooker to cook. This should take 20-25 minutes, depending on the rice cooker, which leaves you plenty of time to prepare the rest.

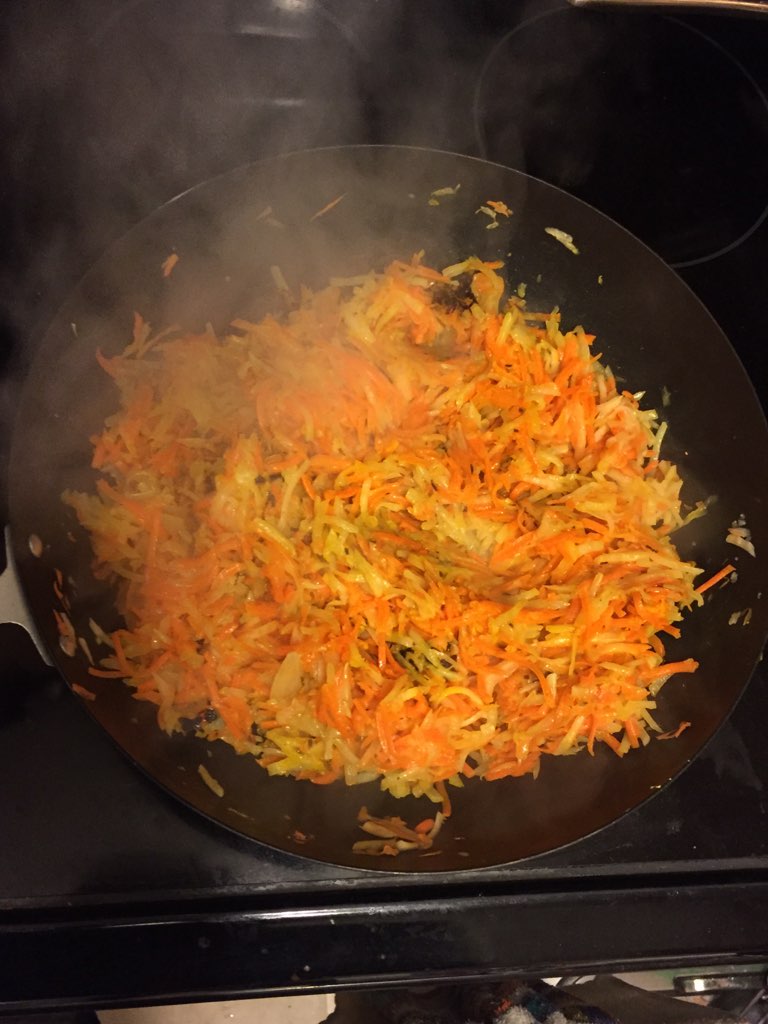
I started by putting the sugar snap peas in a wok with a little water. I cooked this for about 5 minutes. I didn’t want to overcook the peas, and I knew they would do some more cooking later on. I removed them and the water from the pan.

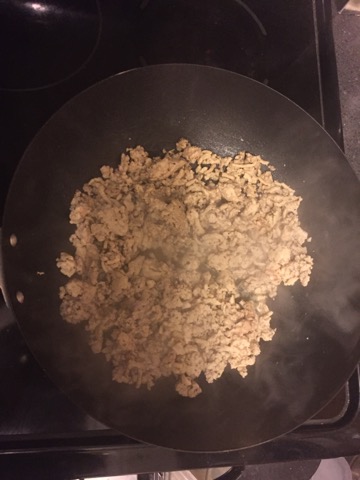
The next step was cooking the ground chicken. Once it was completely cooked through, I removed the fat.

I then added in the can of diced water chestnuts, including the liquid, and mixed these together. If you would prefer to remove the liquid, then that will work as well.

I added the sugar snap peas and mixed them in. I then reduced the heat to medium low and let it continue to cook while the rice was still cooking (about 10 minutes).

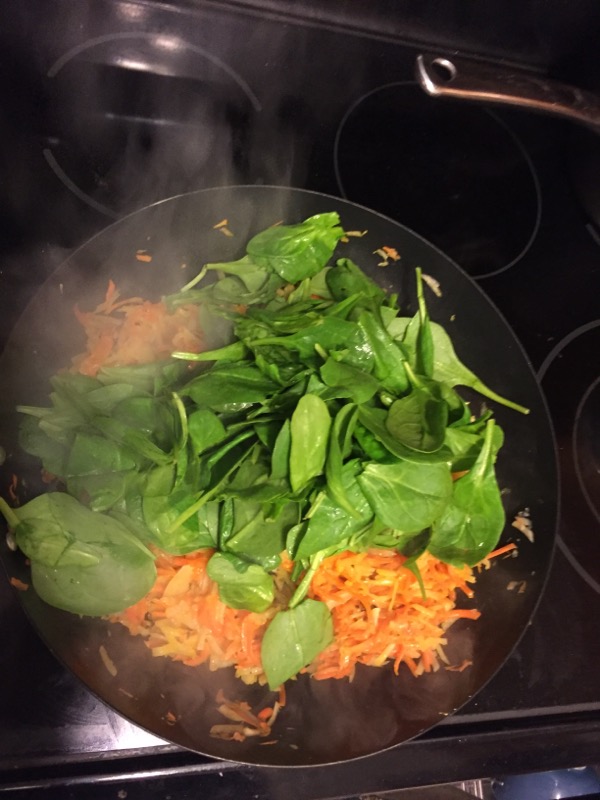
Once the rice cooker clicked off, I added allspice, cumin, nutmeg, cardamom, marjoram, and rosemary to the chicken and veggie mixture.

When the rice finished giving off steam, I opened the lid to make sure it was looking good. The malanga has a slightly purple color (I think taro is usually a bit of a darker purple).

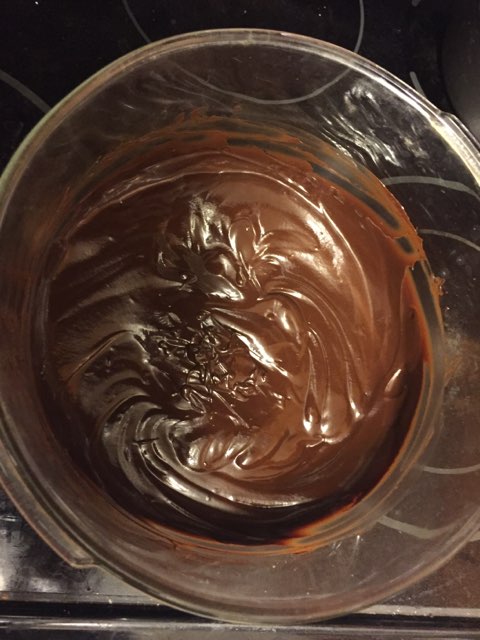
Next is the combining of the meat and veggie mixture with the rice mixture. Once these have been combined well, drizzle in three tablespoons of Sesame oil and give it another stir.

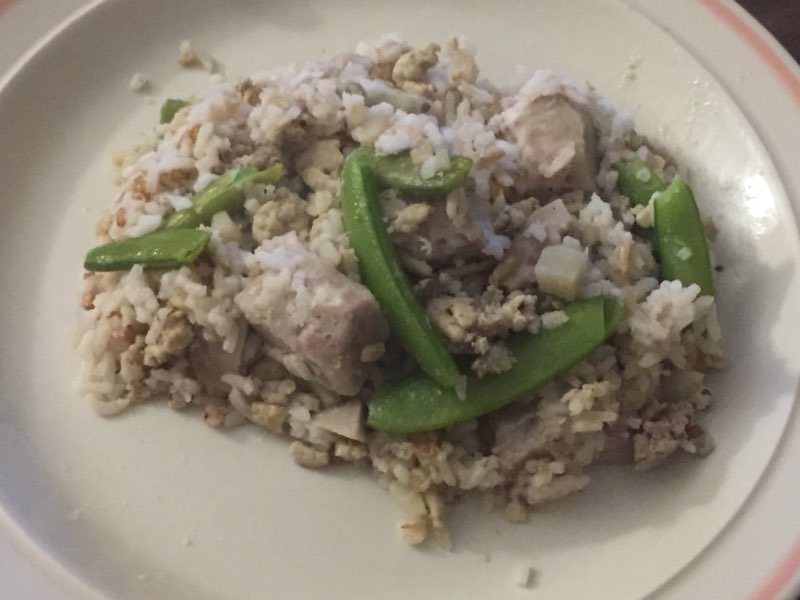
The end result was delicious. You can definitely use different veggies and different seasonings to make it your own. Sometimes when I cook, I try to find lower sodium alternatives, so I don’t always add salt. But if that’s something that you enjoy doing, then you should do it. When I make this again, I’ll probably add some minced garlic and minced ginger. I added some specialty sauces to a couple of bites, but it was good without them as well. The ground chicken flavor wasn’t prominent throughout, which meant that it went according to plan. There are times when one portion of the dish will overpower everything else in terms of flavor. I prefer having an overall balance, where you can have individual bites to taste how each component stands out, but when eaten altogether it just provides a special greeting to the tastebuds.

I hope you try this dish and give it your own unique spin. If you do, I’d love to hear about how you made it and how it all worked out.

← Back

Thank you for your response. ✨

Stay Positive!

Flourless Peanut Butter Cookies

I have been making these cookies for 15 years or so and they never disappoint.

When I would bring these in to work in the past, they went quickly. I had to start making double and triple batches, since these are tough to stop at just one.

Here are the basic ingredients:

1 cup smooth peanut butter

1/2 cup brown sugar

1/2 cup sugar

1 egg

1 teaspoon vanilla

1/2 teaspoon cinnamon (optional)

Preheat the oven to 325 degrees. Put all the ingredients in a bowl and mix until well blended. I wanted to share the picture above because there are not a lot of ingredients to this, and the preparation for this will not take a lot of time.

Once the mixture is blended, it should look similar to the above picture.

Roll into small balls and place on an uncreased cookie sheet (or using parchment paper or silpat liners). I use a medium cookie scoop for this. It should yield anywhere from 1 1/2 to 2 dozen cookies.

Next step is to press down with a fork to get the traditional peanut butter cookie look. Once the oven is ready, bake the cookies for 16-20 minutes (I rotate once half-way through).

Once cooled, these cookies are ready to eat.

I’ve always had a lot of fun making these cookies. They smell great while they are cooking and when they are sitting around waiting to be eaten. They aren’t a seasonal cookie, so they can be made year round. The recipe is pretty simple and it is not time consuming.

I made and brought these cookies to a few different companies I worked for, and they were always a hit. Not everyone likes peanut butter, but the people who like these cookies REALLY like these cookies.

I once overcooked a batch – they weren’t burned, but they were very crispy. I was telling my co-workers about the batch, since I didn’t bring them in, and one of my co-workers requested them. When I brought them in, he devoured them. He loved crispy cookies, so they were right down his alley. I share this story for one simple reason: Even though you may not like something you’ve made or tried to make, it doesn’t mean that someone else won’t like it. My co-worker would have been deprived of those had I not shared the story of my mistake with him. And when I made future batches, I would leave a handful of cookies in the oven an extra minute or two, just so he could have them the way he preferred.

Enjoy!

Cooked Grated Vegetables

I have a tendency to eat a lot of meat and to not always eat healthy. There are times, though, when I want to switch things up. I’ve made a variation of this dish in the past, but I was really happy with the results for tonight’s dinner. This is a vegetarian, low-sodium dish. I eyeballed some of the spices, but will put down my best guess estimates for the portions that I used.

Ingredients – Rough estimates

1 pound carrots

1/2 pound onion

2 pounds potatoes

1 5 ounce bag baby spinach

1 Tablespoon Olive Oil

1 Tablespoon butter

1 teaspoon chopped ginger

1/2 teaspoon garlic powder

1/2 teaspoon turmeric

1/2 teaspoon ground coriander

1/4 teaspoon pepper

1/4 teaspoon caraway seeds

1/8 teaspoon of citric acid.

I used the grater attachment for my Cuisinart and grated 4 large carrots, 1 yellow onion, and 2 large potatoes.

I heated one tablespoon olive oil and 1 tablespoon butter in a wok. Once the butter was completely melted, I added the grated vegetables.

I continuously stirred the vegetables for about 10 minutes. The carrots and potatoes were still a little firm, but they were definitely getting closer to the proper texture.

I then added 1 teaspoon of chopped ginger (from a jar), 1/2 teaspoon garlic powder, 1/2 teaspoon turmeric, 1/2 teaspoon ground coriander, 1/4 teaspoon pepper, 1/4 teaspoon caraway seeds and 1/8 teaspoon of citric acid. I continued to stir for about 2 minutes, until there was a consistent release of steam.

I then added one bag of baby spinach (I rinsed the spinach first, and shook out all of the water) and continued stirring for another 3 minutes.

Once the spinach leaves lost their stiffness, I removed from the heat. The spinach would continue to cook, but would not get overcooked and mushy.

It was ready to plate and eat. You can add seasonings or sauce if you want, or just have it like this. I had this as my main dish (I ended up having a second portion as well). This would work as a side dish. I’ve made this with grated broccoli stalks instead of spinach in the past, but would caution you to use just a little broccoli stalk (and shave off the outside first). They can take longer to cook, but do provide additional fiber.

I used citric acid instead of salt, but that was just my preference to make this a lower sodium dish. I like to use ground turmeric from time to time. There are many health benefits, and it adds flavors that my taste buds enjoy. Ground coriander also brings some additional health benefits. Caraway seeds were something new for me to use. They are good for digestive health, and the seeds add a nice textural element to the dish. If you want to use fresh ginger, garlic and turmeric, I say go for it. I would just recommend adding them after the vegetables have cooked for about 10 minutes and not blending them in with the vegetables at the beginning, since you don’t want to overcook the ginger, garlic and/or turmeric, and possibly lose of the potency of the flavor or health benefits.

Whatever you decide to do, I hope you have fun with this healthy, flavorful, and colorful meal.

Homemade Dark Chocolate Truffles

Homemade Dark Chocolate Truffles.

Homemade Dark Chocolate Truffles. I like the sound of those words so much, I had to repeat them.

It’s been a few years since I made some chocolate truffles, but I wanted to make them this weekend, and today was the perfect day for it. The process can take 6-8 hours from start to finish, but there is plenty of time for breaks in between. The recipe that I use is from a book titled “Chocolate: From Simple Cookies to Extravagant Showstoppers” by Nick Malgieri. I have a couple of slight differences from his recipe, but I use his as the base for mine.

The type of chocolate that you use matters. You don’t have to use the most expensive chocolate in the world to make these, but you want to make sure that there is a level of quality to the chocolate, since you don’t want to have it break down during the steps that involve melting. When selecting the dishes that will be melting or mixing the chocolate, please make sure that everything is dry. Water can cause the chocolate to seize, which will result in a lumpy, muddy mess of chocolate. It can be fixed or used for other things, but will not be good for the truffles.

The first part of this recipe is the Center of the truffle. 1/2 cup heavy cream, 2 tablespoons unsalted butter, 1 tablespoon corn syrup and 8 ounces of melted chocolate. The recipe calls for heating the cream, butter and corn syrup in a nonreactive pan and bring to a simmer over low heat. Remove from the heat and wait 5 minutes. Add the cream mixture to the chocolate and whisk smooth.

I use a slight variation. I heat 1/2 cup heavy cream, 2 tablespoons unsalted butter and 1 1/2 tablespoons corn syrup in a pan over medium low to low heat. As soon as the butter is melted, I remove from the heat and continue to stir.

If you have a glass blender/mixer bowl, place the chocolate in there. While the cream mixture is melting, I heat the chocolate in the microwave over medium – low power for 30 seconds at a time. You don’t want the chocolate to be melted. If it is at a slightly soft consistency, it is done. The chocolate disks that I used took about 1 minute 45 seconds, but if you have smaller disks or chips, that should take less time, since there is less surface area. You want to make sure the chocolate doesn’t get too a temperature that is too high, or it might break down, which will result in a more grainy consistency.

The cream mixture should have cooled for a few minutes, so you can add that to the chocolate mixture and start whisking together.

You should have a nice, melty chocolate mixture once it’s all combined. The next thing you have to do is wait. 2-3 hours should be good enough. You want the chocolate mixture to be at room temperature.

After the chocolate is at room temperature, whip the mixture using an electric mixer on medium speed, for about a minute, until it lightens in color. It should be a duller brown color (similar to the picture above). Make sure you use a scraper or spatula along the bottom and the sides to ensure the mixture is completely combined.

The next step in the recipe is to spoon the mixture into a pastry bag fitted with a 1/2 inch plain tube. Pipe 1/4 inch balls on to the prepared pan. My variation is to use a small scooper/squeezer. It’s similar to an ice cream scoop and can be found in many kitchen stores. I have multiple sizes, which help if I’m making larger truffles, or if I want to make some uniform sized cookies.

I scoop these onto a cookie sheet that has been lined with wax paper. The next step is to chill for at least an hour. I usually put these in a refrigerator for 2 or 3 hours. The next step will involve dipping these and coating them in melted chocolate, so you want to make sure that the centers are chilled enough so they won’t melt as soon as they get into the chocolate to be coated.

Next is coating the truffles. The recipe calls for 12 ounces chocolate and 2 cups cocoa powder. Once the centers are chilled, melt the chocolate by tempering, or allowing it to cool to about 90 degrees. Coat the truffles using your hand, depositing them into a pan of sifted cocoa.

I have a slight variation for this as well. I use a double broiler to melt the 12 ounces of chocolate. You do not want the water on the bottom pot to be touching the top pan. This can lead to burning the chocolate. Once the last bits of chocolate have melted, I add just a little bit of vanilla (less than 1/8 teaspoon). This is just a personal preference. Let this rest for 5 minutes or so, to make sure the chocolate isn’t too hot for coating.

I use one fork and one spoon. I place one or two truffles into the melted chocolate, cover them with the spoon and bring them up with the fork. The chocolate will fall through the prongs of the fork and will be easy to transfer back onto the wax paper. I don’t put them in cocoa powder, but again, it’s just a personal preference.

This picture is taken at the half-way point from one of my trays.

This is one of my trays that has been completed. The chocolate is shiny and still very melty.

You can let these sit at room temperature for a couple of hours.

You should be able to notice a change in the appearance of the chocolate as it cools. You can touch the truffles to see if the outer layer has gotten firm. Once it has, they are ready to be eaten.

I used a 75% dark chocolate for the center and a blend of 75% and bittersweet for the outer coating. In the past, I have placed the truffles in the refrigerator once I finished coating them. If you do that, you’ll want to keep them refrigerated. If you take them out to sit, they will get melty and you will have chocolate fingers. There is nothing wrong with that, but I wanted to give you a heads up.

You can always mix things up. If you want to add some unique flavors to the center, add a little more chocolate if you are going to use a liquid. I’ve used peppermint extract, Amaretto, Espresso, etc., to change things up. I’ve also switched peppermint extract for vanilla for the chocolate coating, but it still has to be a very small amount. Too much liquid will affect how the chocolate will settle and solidify. If you want to use an outer coating of chocolate powder go for it. If you want to try something different, you can also change things around. Powdered sugar, cinnamon, chopped nuts, sprinkles, etc.

If you want to try the center and chocolate coating with different chocolates, then go for it. Make it your way. It’ll be delicious. And if you make any mistakes, they will be delicious mistakes!

Quick and Easy White Chocolate Pumpkin Pudding Pie Recipe

I am sharing a twist to a recipe that some of you might be familiar with. You might have seen the traditional pudding pie recipe on places such as the back of the label of a graham cracker crust, the side of a pudding box, or somewhere else. White chocolate and pumpkin occasionally go together in recipes, which is the reason I wanted to try this twist today.

The total prep time for this was less than 20 minutes. Once it’s put together, it should still be refrigerated for at least an hour or so, but at least the prep work can go by fairly quickly. The ingredients I used for this are as follows:

4 cups of milk split into two equal portions (I used 2% milk)

1 small package instant pudding – Pumpkin Spice

1 small package instant pudding – White Chocolate

1 Graham Cracker Pie Crust

1/2 – 3/4 of an 8 ounce container of whipped topping

The first step is to make the instant pudding packages as directed (usually 2 cups of milk and the pudding mix mixed together for about 2 minutes). If you happen to have a 32 ounce Blender Bottle around, this works really well for mixing each of the puddings. Once the puddings are in their bowls, they should take about 5 minutes to set.

I put the puddings into the Graham Cracker Pie shell side by side.

I then used a fork to swirl them together. I didn’t want to have them completely mixed together, but wanted there to be a distinction between the white chocolate pudding and the pumpkin spice pudding.

The final step was to put the whipped cream topping on top. If you want to use the entire container, then go for it. I only used slightly more than half the container, since I didn’t think it would need a heavy amount of the topping, and it would be harder to use the lid to seal the pie if there was too much.

It is now ready to dig in. I hadn’t tried this before, but I like how the flavor turned out. The white chocolate pudding is a very smooth, mild flavor. The pumpkin spice pudding gives it a little kick that it needs. The graham cracker crust adds another layer of flavor as well as some much needed texture. The whipped topping adds some creamy sweetness to round it all out.

I have tried different variations before, but usually with chocolate pudding – layering with ganache, combining the pudding and whipped topping together, etc. It was nice to try something I hadn’t done before and have it turn out to taste good, too.

Modified Shepherd’s Pie

I had planned on making some Shepherd’s Pie tonight, but since I got home early from my morning errands, I made it a bit earlier.

Shepherd’s Pie is traditionally lamb that is cooked in gravy or sauce with vegetables, and topped with mashed potatoes. Cottage pie is similar, but with beef as the main source of meat. There are variations of the meats and vegetables, but this is a nice hearty meal that is perfect for the Fall season.

My version has slight modifications, but the overall spirit of the meal still exists.

One ingredient that I use, but can be hard to find, is Ballymaloe Original Sauce.

I first discovered this sauce about 7 or 8 years ago. It works well on hamburgers, but is great with Shepherd’s Pies. This is a tomato relish and includes sultanas. I’m not usually a fan of raisins, but these work really well in this sauce/relish.

Start by preheating the oven to 400.

My first cooking step includes a big cheat. I used one pouch of instant mashed potatoes. Once those were hot and ready, it was on to the next.

I cooked up one pound of ground lamb. As soon as the meat is no longer pink, drain the fat. Reduce heat to medium. Add in one can of peas and carrots (14.5-15 ounces) with the liquid drained. I then added one 7.5 ounce jar of Ballymaloe to the mix. I put 1/2 cup of water into the jar and swirled it around to make sure I got all of the good bits of the relish, and then added them to the mixture.

Continue mixing for another 2 minutes, making sure the ingredients are mixed in. Grease an 8 inch round casserole dish and add the meat mixture.

Add the mashed potatoes (should be 2 cups) and gently press down to make an even layer.

Place in the 400 degree oven and bake for 25 minutes.

Let cool for about 5 minutes and enjoy!

This was just one of my modifications. If you want to have more crisp to the mashed potatoes, you can put it under a broiler for about 5 minutes. You can add cheese on top of the mashed potatoes before cooking. You can add in other vegetables. Create your own unique version if you would like.

Making this was one thing, but it all comes down to the taste. I was really happy with how this turned out, in terms of flavor. The lamb wasn’t gamey. The sweetness of the tomato relish came out well and the mashed potatoes really brought everything together. It would have been interesting to have a different texture, so crisping the mashed potatoes a bit under the broiler might have done the trick, but it wasn’t necessary. I enjoyed making this today and was happy to share.

Eat Well!

Easy Like Sunday Morning

I tend to be a morning person. I usually wake up before 5AM, sometimes before 4AM. I might be a bit sleepy and tired at first, but I’m usually perked up and ready for the day after about 3 or 4 minutes. This past Sunday morning, I was a bit off. I was not “feeling it” at all. I am not sure why, it’s just how it went. I don’t think it was due to the overtime loss of the Caps the night before. I don’t think it was due to the gloomy weather (which I prefer). Sometimes things just are a certain way and we can’t explain them.

I ran some errands early on, but being out and about in perfect Fall weather didn’t help. I had originally planned to drive down and visit the Sykesville Farmer’s Market, but I didn’t have the energy or the drive to do it. I knew I had to get myself out of this morning funk, so I went out the front door and started walking, with the intention of walking to the Farmer’s Market. When I first got outside, the temperature was a nice, cool upper 50s/lower 60s and slightly overcast, which is my kind of weather. But I was still not perking up. Then, I started to listen to the silence. There was noise, but it was not people or cars or a train or anything else. It was different birds, frogs, insects, and more. Just listening to the sounds of nature and then looking at the trees helped get me going in the right direction.

I walked around the Farmer’s Market very briefly. I just did a quick walk-through without stopping to chat or really look at anything. I decided to get a Pumpkin frappe at French Twist Cafe, which was good as usual. When I was waiting for my drink, a couple walked in. They said it was their first time there, but they had heard about the place before and wanted to try it. They asked me for my opinion, and my face just lit up. I let them know about the coffee drinks and the crepes, and how good they all are. I was sure that they would enjoy anything they got, and the quality would be outstanding. The couple seemed to be really excited about being there, and I completely understood. If I’m in a a new place and I’ve heard good things and the menu looks good, I get really excited. If I’m talking about food, I am usually in a happy place. So this was the final step of me getting out of my funk and feeling better about the day.

I walked home and just enjoyed all that nature had to show me. The squirrels were running around trying to snatch the nuts that were falling from the trees. There was a lot of rustling in the trees and the bushes, so there were some other creatures that were enjoying the day. I had a really nice time for that 20 minute walk home. This is despite the walk home being mostly uphill. But those 20 minutes were more appreciated than a 5 minute drive would have been.

Sometimes we have bad days. Sometimes we have bad moments. But if we can try to find ways to get the negatives out of our heads and bring in the good moments, no matter how brief, it can help make for a better day. I took a few pictures on my walk, and wanted to share them.

This is just a picture of some trees. They aren’t uniform, they aren’t standing out. They are just there. But that’s what I enjoyed about them.

I’m not sure if these are coming through very clearly. I took one picture of the tree and then a close up. There are huge nests on these trees. The first time I saw these, I was driving up the 97 and had no idea what they were. If they were spider webs, then those spiders must have been big (I’m thinking Lord of the Rings big). But they were all over the place and some were up to 3 feet long. I thought these were tent caterpillars, but they are apparently web worms. Not just for the Internet, I guess. 🙂 Still pretty cool to see, though.

I thought this nest was particularly fascinating. The picture doesn’t do justice to the intricacies of this structure.

I liked the colors on this tree.

I zoomed in so you could see the different colors. Yellow, green, light green, yellow with brown creeping in.

After I arrived home, I decided to take a picture from my enclosed patio. I have a really nice view, but don’t take advantage of this as often as I should. I have to clean up the chairs, since they have a lot of dust and pollen sitting there from the Summer. But this will be a nice area for me to just sit and read or reflect or listen, now that the temperatures are comfortable.

I may have started the day negative, but I was able to get out of it and end it feeling positive.

An Unsuccessful and Successful Dinner

An unsuccessful AND successful dinner? Huh? What does that mean? Am I trying to be silly? The answer to the last question is always simply this: I am not trying to be silly. I just am. I had an idea for a sandwich for a few days, and I decided to try it last night. I had some leftover spinach dip, and wanted to do something with that; along with a chicken patty and some flour tortillas. Sounds simple enough, I guess.

When I was thinking about the tortilla shells, I wanted to have a slightly crispy tortilla. Not too soft, since it would be very mushy. Not too hard, since the crispness might cause it to break too easily. Looking more for something in between. So I took some soft taco shells and cut them so there would be a top and bottom layer that would fit the chicken patty. I used a drink cup lid as the stencil and then used a knife to cut around to get the circular-ish shape. Since there were still some tortilla leftover, I decided to cut them up into bite-sized pieces. I then baked these in a 250 degree oven for about 15 minutes or so. I wanted to cook them at a lower temperature since my oven might cook things too fast if I tried it at 350. When they were the right texture (mostly solid shell, with slight flexibility), I took them out.

Once the chicken patty was cooked, the sandwich was ready to assemble. I put a light layer of spinach dip on both pieces of tortilla, so there would be some on the top and on the bottom between the tortilla and chicken patty. The sandwich assembled the way in which I was hoping. Then, I took a bite. The flavor of the spinach dip and the chicken patty worked well together. The tortilla, though, was another story. The baking caused it to be a little tough, so it took extra effort to bite through the tortilla. The extra effort of biting through the tortilla caused the chicken patty to occasionally slide around, which meant that when the final clamping of the teeth was finished, it was just the tortilla and spinach dip, without chicken, for some of those bites. So it wasn’t exactly what I was hoping for when I first had the idea. But I am okay with that. I learned something new. So… there was success even with the lack of success. And the little bite-sized pieces were the perfect consistency to snack on with the little spinach dip that remained. So I could do the same thing with the tortilla pieces in the future to use with a dip. Not quite the same consistency as a fried or packaged chip. They still had a nice crunch, but since they were slightly thick, I still got some good flavor of the tortilla and a little bit of softness on the inside. So a perfect consistency for the spinach dip (for me).

Things don’t always work out the way we plan. Sometimes, they turn out better than expected. Sometimes, they turn out worse. But if we learn something from the bad experiences, that’s always a good thing. Stay positive!

Chili and Cheese Baked eggs

Last night, I decided to try something new. I had some leftover canned chili from the day before (chili burgers for National Cheeseburger day). I decided that I wanted to bake it with some eggs and cheese in ramekins. I have had a set of ramekins for more than 10 years, but this is the first time I actually used any of them.

I set the oven to 350. I combined the chili, 2 eggs, milk (eyeballed about 2 tablespoons) and shredded cheddar cheese in a bowl. Once mixed, I buttered the ramekins and portioned out the mixture. I added some spicy sauce and gently mixed it in. I put it in the oven and baked it for 20 minutes. The center was jiggling a bit too much, so I put it in for another 5 minutes. The center had just a slight jiggle, so it was good to come out. I topped it off with a little sour cream. It turned out pretty good in terms of taste. The sauce added the perfect kick to it. The texture could have been a little better. I think that the next time I make something like this, I will whisk the eggs first, then whisk in the milk, and then combine the rest of the ingredients. I feel that it needed some more consistent fluffiness, and combining all the ingredients at once did not get me the desired result.

Now, onto the spicy sauce. I don’t know if this is still in production. It’s called Scotty B’s Ghostly Garlic sauce and is probably the best spicy sauce I’ve had. There is a nice kick due to the Ghost Peppers, but the flavor is what wins me over. It doesn’t burn the tongue or back of throat, so you are able to enjoy the combination of flavors of the garlic and the Ghost Peppers.

When I lived in California, I first encountered this at Whole Foods. My sister and I went on one of our long runs/walks (about 8 miles) and we stopped at Whole Foods for a food and coffee drink break. We got their breakfast pizza, which was really good, by the way. When looking for something to go with the pizza, I looked at the different sauces and this one stuck out. It only took a little bit of the sauce to enhance the flavor. My sister cannot stand spicy food at all, but even she would continue to eat this sauce.

I left California just over 4 years ago, and missed out on the sauce. One of my other sisters found these on-line a couple of Christmases ago, so I’ve been savoring them as long as I can before my supply runs out.

So I had some good food and some good memories last night. That makes for a positive experience. Missing things and people can bring on moments of sadness, but as long as I focus on the positive aspects, everything is all right. Stay positive and enjoy!