
Homemade Dark Chocolate Truffles.

Homemade Dark Chocolate Truffles. I like the sound of those words so much, I had to repeat them.
It’s been a few years since I made some chocolate truffles, but I wanted to make them this weekend, and today was the perfect day for it. The process can take 6-8 hours from start to finish, but there is plenty of time for breaks in between. The recipe that I use is from a book titled “Chocolate: From Simple Cookies to Extravagant Showstoppers” by Nick Malgieri. I have a couple of slight differences from his recipe, but I use his as the base for mine.
The type of chocolate that you use matters. You don’t have to use the most expensive chocolate in the world to make these, but you want to make sure that there is a level of quality to the chocolate, since you don’t want to have it break down during the steps that involve melting. When selecting the dishes that will be melting or mixing the chocolate, please make sure that everything is dry. Water can cause the chocolate to seize, which will result in a lumpy, muddy mess of chocolate. It can be fixed or used for other things, but will not be good for the truffles.
The first part of this recipe is the Center of the truffle. 1/2 cup heavy cream, 2 tablespoons unsalted butter, 1 tablespoon corn syrup and 8 ounces of melted chocolate. The recipe calls for heating the cream, butter and corn syrup in a nonreactive pan and bring to a simmer over low heat. Remove from the heat and wait 5 minutes. Add the cream mixture to the chocolate and whisk smooth.
I use a slight variation. I heat 1/2 cup heavy cream, 2 tablespoons unsalted butter and 1 1/2 tablespoons corn syrup in a pan over medium low to low heat. As soon as the butter is melted, I remove from the heat and continue to stir.

If you have a glass blender/mixer bowl, place the chocolate in there. While the cream mixture is melting, I heat the chocolate in the microwave over medium – low power for 30 seconds at a time. You don’t want the chocolate to be melted. If it is at a slightly soft consistency, it is done. The chocolate disks that I used took about 1 minute 45 seconds, but if you have smaller disks or chips, that should take less time, since there is less surface area. You want to make sure the chocolate doesn’t get too a temperature that is too high, or it might break down, which will result in a more grainy consistency.

The cream mixture should have cooled for a few minutes, so you can add that to the chocolate mixture and start whisking together.
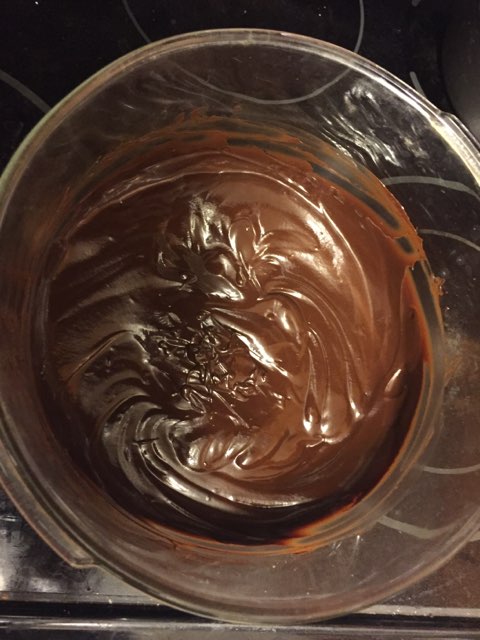
You should have a nice, melty chocolate mixture once it’s all combined. The next thing you have to do is wait. 2-3 hours should be good enough. You want the chocolate mixture to be at room temperature.
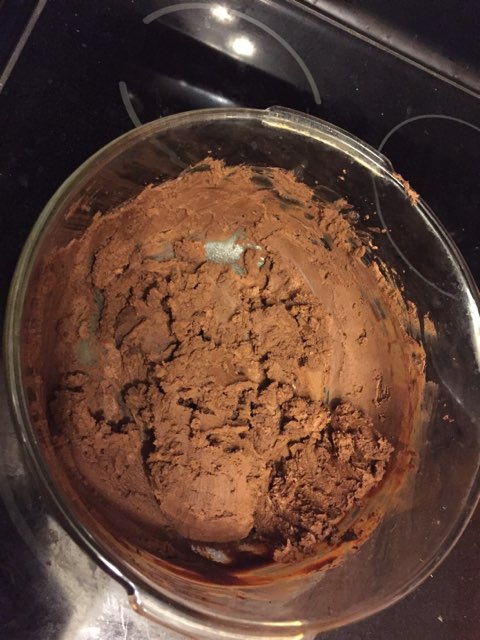
After the chocolate is at room temperature, whip the mixture using an electric mixer on medium speed, for about a minute, until it lightens in color. It should be a duller brown color (similar to the picture above). Make sure you use a scraper or spatula along the bottom and the sides to ensure the mixture is completely combined.
The next step in the recipe is to spoon the mixture into a pastry bag fitted with a 1/2 inch plain tube. Pipe 1/4 inch balls on to the prepared pan. My variation is to use a small scooper/squeezer. It’s similar to an ice cream scoop and can be found in many kitchen stores. I have multiple sizes, which help if I’m making larger truffles, or if I want to make some uniform sized cookies.

I scoop these onto a cookie sheet that has been lined with wax paper. The next step is to chill for at least an hour. I usually put these in a refrigerator for 2 or 3 hours. The next step will involve dipping these and coating them in melted chocolate, so you want to make sure that the centers are chilled enough so they won’t melt as soon as they get into the chocolate to be coated.
Next is coating the truffles. The recipe calls for 12 ounces chocolate and 2 cups cocoa powder. Once the centers are chilled, melt the chocolate by tempering, or allowing it to cool to about 90 degrees. Coat the truffles using your hand, depositing them into a pan of sifted cocoa.

I have a slight variation for this as well. I use a double broiler to melt the 12 ounces of chocolate. You do not want the water on the bottom pot to be touching the top pan. This can lead to burning the chocolate. Once the last bits of chocolate have melted, I add just a little bit of vanilla (less than 1/8 teaspoon). This is just a personal preference. Let this rest for 5 minutes or so, to make sure the chocolate isn’t too hot for coating.
I use one fork and one spoon. I place one or two truffles into the melted chocolate, cover them with the spoon and bring them up with the fork. The chocolate will fall through the prongs of the fork and will be easy to transfer back onto the wax paper. I don’t put them in cocoa powder, but again, it’s just a personal preference.
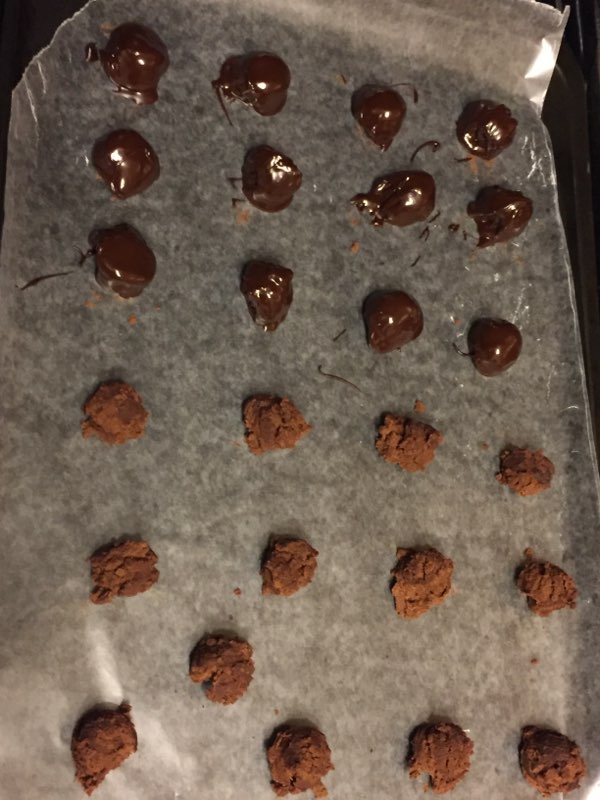
This picture is taken at the half-way point from one of my trays.

This is one of my trays that has been completed. The chocolate is shiny and still very melty.
You can let these sit at room temperature for a couple of hours.

You should be able to notice a change in the appearance of the chocolate as it cools. You can touch the truffles to see if the outer layer has gotten firm. Once it has, they are ready to be eaten.
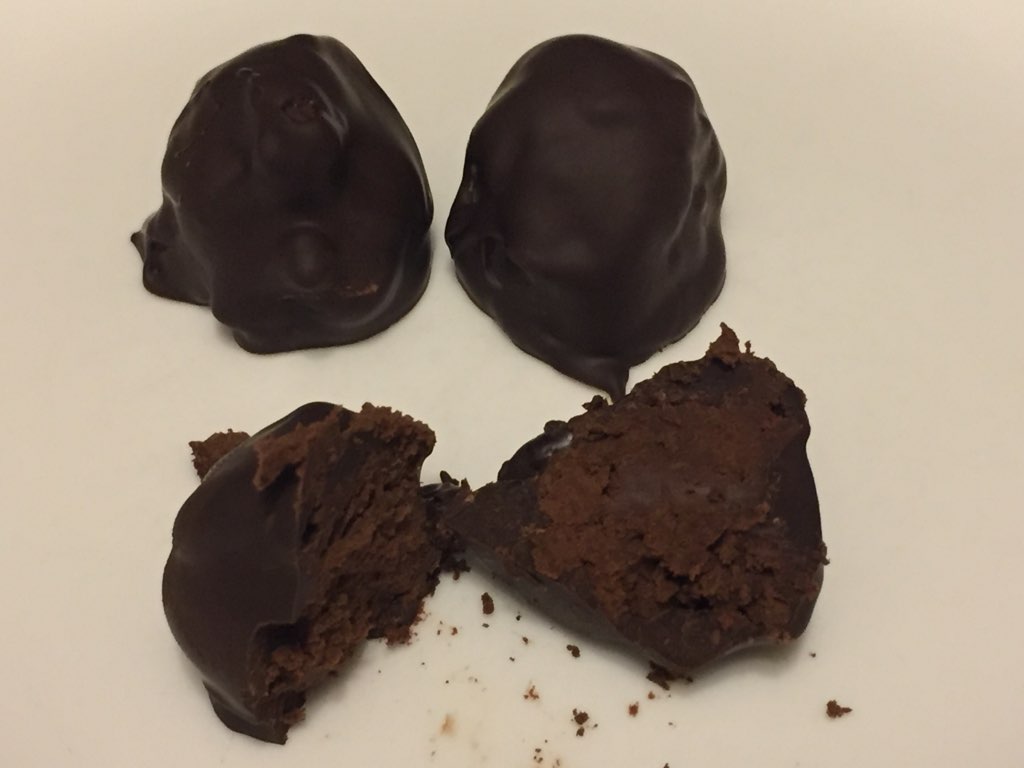
I used a 75% dark chocolate for the center and a blend of 75% and bittersweet for the outer coating. In the past, I have placed the truffles in the refrigerator once I finished coating them. If you do that, you’ll want to keep them refrigerated. If you take them out to sit, they will get melty and you will have chocolate fingers. There is nothing wrong with that, but I wanted to give you a heads up.
You can always mix things up. If you want to add some unique flavors to the center, add a little more chocolate if you are going to use a liquid. I’ve used peppermint extract, Amaretto, Espresso, etc., to change things up. I’ve also switched peppermint extract for vanilla for the chocolate coating, but it still has to be a very small amount. Too much liquid will affect how the chocolate will settle and solidify. If you want to use an outer coating of chocolate powder go for it. If you want to try something different, you can also change things around. Powdered sugar, cinnamon, chopped nuts, sprinkles, etc.
If you want to try the center and chocolate coating with different chocolates, then go for it. Make it your way. It’ll be delicious. And if you make any mistakes, they will be delicious mistakes!


