There are times that I have a couple of meals planned out, so I start to buy the ingredients and think about how I can use them for a couple of meals. I did this yesterday and made a pretty good roast chicken.
INGREDIENTS
1 whole chicken – 5-6 pounds
1/2 onion, cut into rings
2 carrots, coarsely chopped
3 red potatoes, coarsely chopped
1 Tablespoon Poultry Seasoning
1 teaspoon black pepper
1 teaspoon Pink Himalayan sea salt
1 teaspoon garlic powder
1 teaspoon onion powder
1/4 cup orange juice
I preheated the oven to 300 degrees. I wanted this to cook at a lower temperature for a longer period of time.
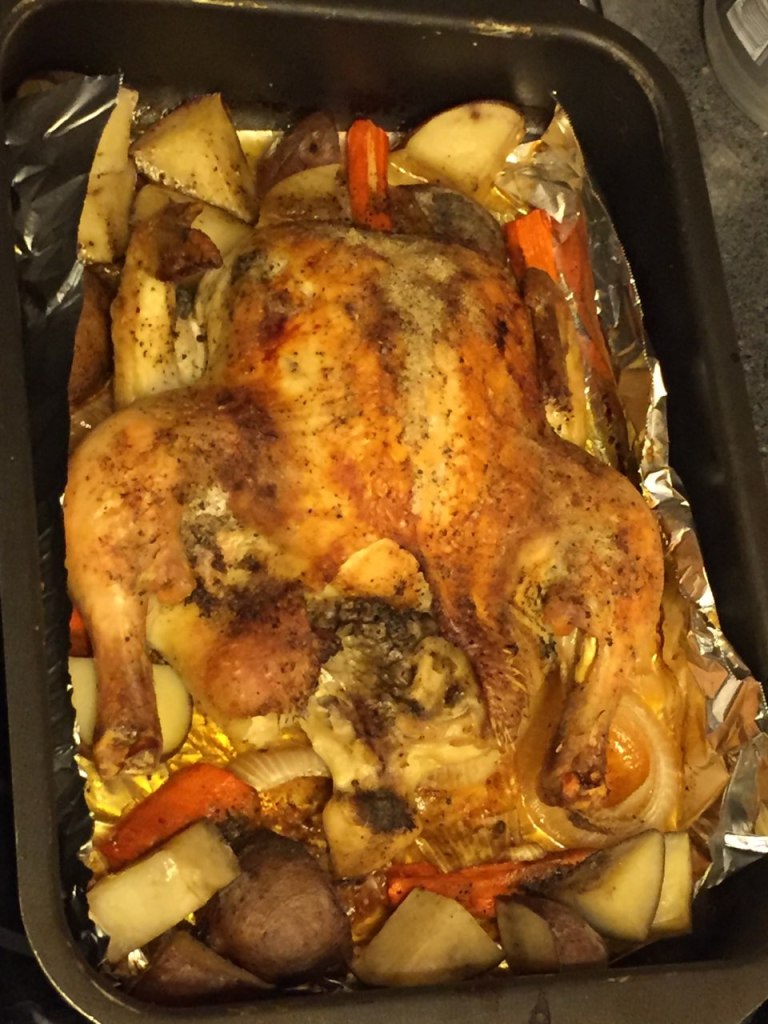
I started off by chopping the vegetables. I then placed them in a roasting pan that was lined with aluminum foil. I positioned the vegetables so that the chicken could rest on top of the onions, while the potatoes and carrots would be in the surrounding area.
The seasonings and orange juice are all rough estimates. After removing the bag of giblets, I made sure to rinse and pat the chicken dry before placing on top of the onions. I then poured over the orange juice, making sure it got on the back and front of the bird. I put the seasonings into a small bowl and mixed them up. I then put rubbed them into the back, the front, the inside cavity and a little under the skin.
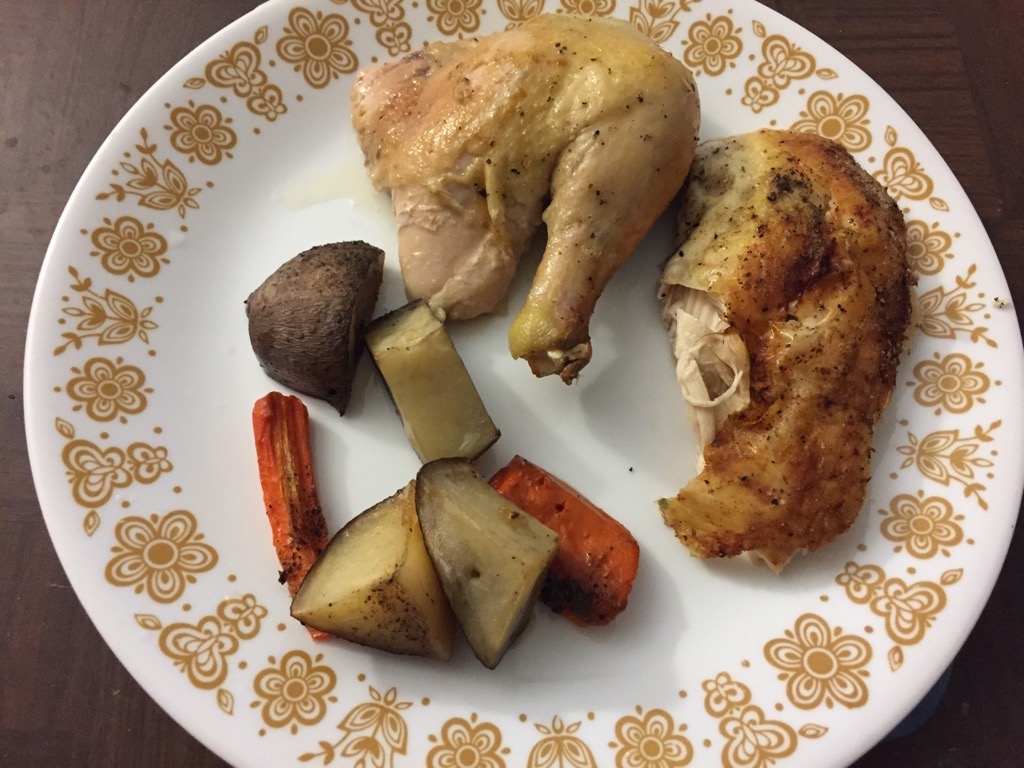
I baked the chicken for about three and a half hours. The meat was fall off the bones tender, juicy, and full of flavor. The skin was nice and crispy, with a robust flavor from all the seasonings. The potatoes and carrots were soft and pleasant tasting. The onions were really sweet and rounded out the meal very well.
I made two different broths from this chicken. The first broth was made using the giblets from the bag. I boiled those on medium-high heat in about 3 cups of water, with some diced fresh ginger, diced fresh garlic and diced fresh turmeric added. Once this got to a boil, I let it boil for 20 minutes and then turned the temperature down to medium-low heat. I let this continue for another 30 minutes and then it was ready to save.
The second broth was made after the meal was over. I removed the meat from the bones and set aside for a separate dish. I used a pasta pot, since it has a strainer. I put the bones in the strainer and then added water until it was covering all the bones. I boiled this on medium-high heat. Once this got to a boil, I let it boil for 30 minutes and then turned the temperature down to medium-low heat. I let this continue for another hour and then it was ready to save. Since this had flavor from the chicken bones (with some skin and seasoning still in tact), I did not feel the need to add anything else to the broth. I saved some of the broth in the refrigerator, and put the rest in storage bags in the freezer. These will provide me with some quick broth for a future meal.
The flavor of the chicken was much better than I was expecting, and I was very happy with how tender the meat was. It was an easy way to keep me staying positive!
I’ve made these cookies a couple of times. The batch I made yesterday included a lot more butter (1 stick more) than usual, but I think that it worked well and I wanted to share.
Ingredients:
1/4 cup powdered sugar
2 1/2 sticks (20 Tablespoons) softened butter
1 1/2 Tablespoons sugar
1/4 teaspoon salt
1 1/4 cups flour
1/4 cup corn starch
2 teaspoons curry powder
1 cup roughly chopped cashews (unsalted, raw is preferred)
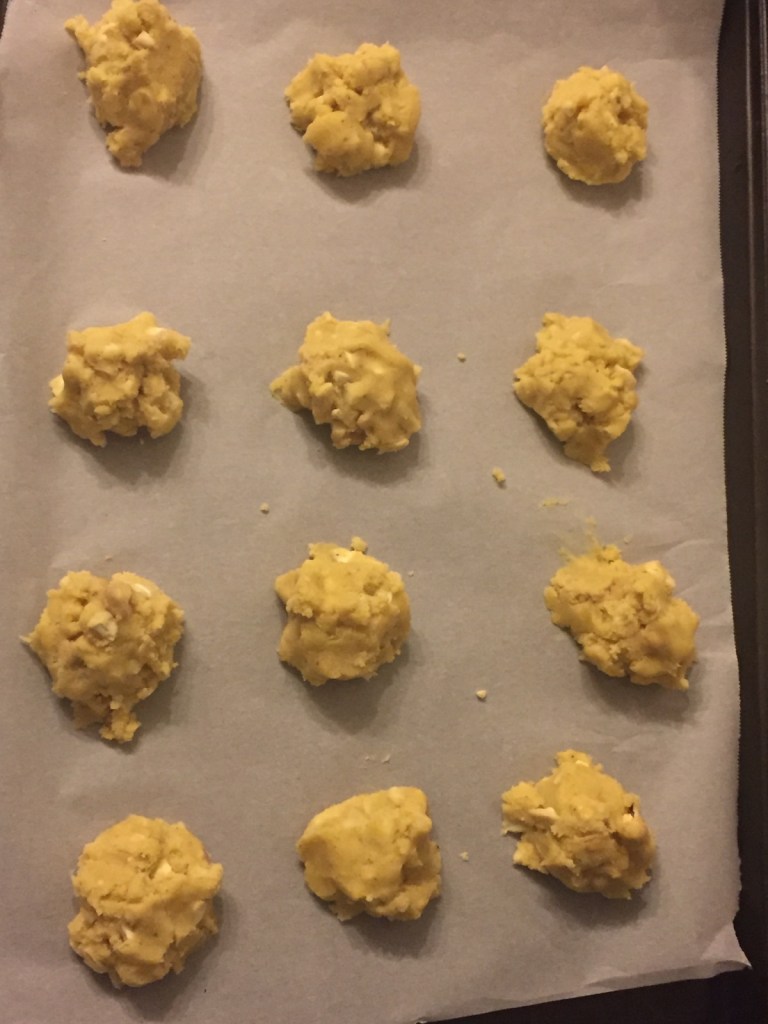
Preheat the oven to 300. Mix the powdered sugar, butter, sugar and salt until the mixture is creamed and fluffy. Sift in the flour, corn starch and curry powder. Knead together in the bowl until a ball of dough forms. FYI, this is going to be a very sticky dough. If the dough is dry, add a couple of drops of water until all of the dry mixture is incorporated. Add in the chopped cashews and mix together (I put whole, raw, unsalted cashews in a lightly sealed bag and use a rolling pin to get it to be a rough chop). Place by spoonfuls onto a cookie sheet (I line mine with parchment paper).
When they are all on the cookie sheet, you can form them or make them into shapes if you would like. Bake for approximately 45-50 minutes, rotating once halfway through.
There should be a nice brown coating along the bottom edges of the cookies.
This cookie is very rich and flavorful. You have the rich buttery flavor, the subtle curry flavor, and the smooth flavor of the cashews, with a little bit of a crunch. The cookies will break apart easily, but they almost melt in your mouth. Even though this has 2 teaspoons of curry powder, it’s not an overbearing flavor. This is a sweet cookie with hints of savory. Since it breaks apart, the cashews help hold it together, and they also add a nice combination of flavor with the curry.
I’ve made the South American version of Alfajores before, and the corn starch and flour combination give those cookies their texture. That is the reason I wanted to have some corn starch in these cookies. If you would prefer to do without, just make sure to adjust the recipe and add an additional 1/4 cup flour instead of the corn starch.
I had two bonuses with this batch. The first was the parchment paper after the cookies were removed. There were little brown butter crumbs which had an extra layer of flavor. The other bonus was the aroma. I enjoy the smell of curry, and it was all over the house. And when you are getting ready to bite into these cookies, the slight smell of curry goes into the nose and invites an extra layer of sensory enjoyment. It’s easy to stay positive when eating these!
About a week or so ago, I noticed there was a new special at French Twist Cafe. I’m not sure how long it had been posted, but once I saw the name and description, I knew I would want to try it. I enjoy some of the seasonal foods, and around this time, there are holiday sandwiches and holiday bowls that are based upon Thanksgiving. The French Twist cafe has their spin, the Frenchgiving Crepe. Their description says it all. A Thanksgiving dinner served in a crepe: Pulled turkey, cranberries, cornbread stuffing, gravy and seasoning. That has all the ingredients for a meal that I just wouldn’t be able to resist.
Yesterday, I decided to make my way over there. I ordered the specialty crepe and also had their specialty drink, a Pumpkin Frappe. I could have eaten there, but chose to go instead. Their frappes are always really good, and yesterday’s was no different. It was made perfectly, had the right consistency and a really good flavor. It might have been my favorite pumpkin frappe of the season so far.
I like the fact that this restaurant is in a house. When you walk in, the crepe station is about 10-15 feet from the front door. There are a couple of tables on the first floor (and outside), or you can go upstairs for additional seating. When I get a crepe, I like to just stand behind the glass and watch as they make the crepes. I was able to get a picture before they started closing up the crepe. They started by pouring the batter and using the spreader to make it one giant crepe. Once it was flipped over, they started assembling the filling. They started with the turkey, then added the stuffing. Next was sprinkling on the seasoning. The cranberries were added and it was finished off with drizzling the gravy.
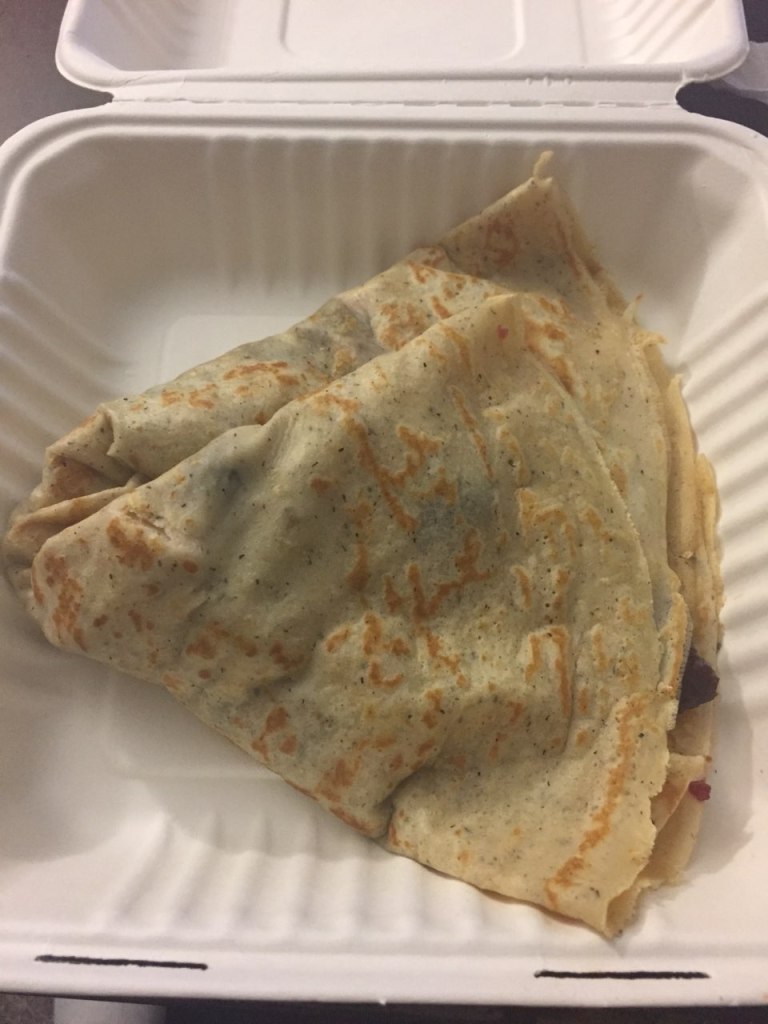
They folded it up and put it into a container for me, and I was on my way. It’s hard to tell the dimensions, but this is a very large crepe, especially when you factor in the fillings.
I thought it would be good to take a picture when I was still eating it, so you could hopefully see the fillings in there. I tried the turkey on its own and the stuffing on its own, and they were both really good. The bites that had everything together – crepe, turkey, stuffing, gravy and cranberry – were outstanding. The flavor and texture of the crepe added a really nice component, which made my tastebuds and mouth very happy. This was a new twist (pun intended) on a seasonal sandwich, and I was glad I had the opportunity to try it. It definitely helped me stay positive!
I still had some leftover malanga, and I had it in my head to try and make a variation of pierogi that used mashed malanga instead of potatoes. There are three separate components that are part of this recipe: caramelized onions, mashed malanga, and the dough and pierogi. The caramelized onions and mashed malanga are good independent of this dish, but work well together for this. I am going to share how I put this together.
I will start with the caramelized onions, then move on to the malanga, and then move on to the pierogi. If timed well, the dough can be the first thing made, then the onions and mashed vegetable, and then the pierogi. There is a good flow when putting it together, but I’ll focus on the separate recipes.
CARAMELIZED ONIONS
1 medium size yellow onion, chopped
1 Tablespoon butter
1 Tablespoon olive oil
Pinch of salt (optional)
Pinch of sugar (optional)
1/4 cup of water (optional)
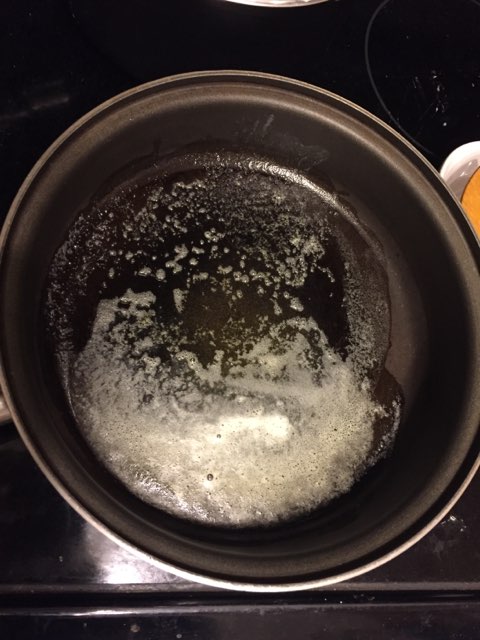
Place the butter and oil in a large saucepan over medium high heat. Once the butter has melted and the mixture has some foamy bubbling, add the chopped onion and turn the heat down to medium.
Make sure the onion is layered evenly on the bottom of the pan. Stir every 2-3 minutes. The entire process should take between 30-50 minutes.
When the onion starts to get a little brown, add the dash of salt if desired. Continue to stir every 2-3 minutes.
Once the onions have gotten a deeper brown, you can add 1/8 cup of water and a dash of sugar if desired and turn heat to medium low. Continue to stir every 2-3 minutes. The stirring should allow for enough time for the onion to brown without burning or sticking to the bottom of the pan.
Once the onions have some really nice caramelization going, add a little more water to prevent burning. After another 2-3 minutes, the onions should be done and ready to be removed from the stove.
MASHED MALANGA
1 1/2 pounds malanga, chopped
1/4 cup softened butter
1/4 – 1/2 cup milk
1 teaspoon garlic powder (optional)
1 teaspoon onion powder (optional)
1/8 teaspoon pepper (optional)
2 teaspoons paprika (optional)
1 cup shredded cheese (optional)
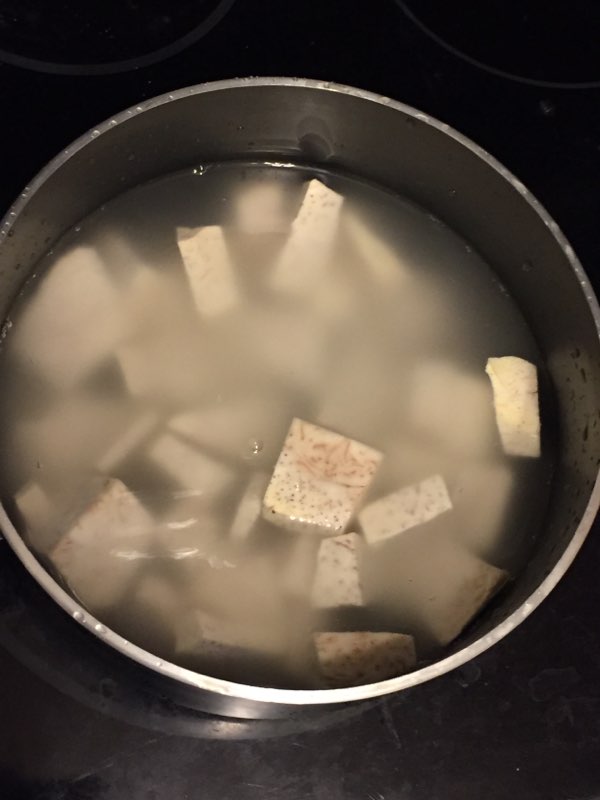
Malanga is a very hard root, so be very careful when cutting. Remove the outer skin and cut the malanga into pieces. Rinse well. Put into a pot and fill water so that it is about 1 inch above pieces. Bring to a boil and let it continue to boil for about 15 minutes. When the largest pieces of malanga fall off a fork with ease, the malanga should be ready (should be similar to boiling potatoes). Drain water and put malanga back in pan.
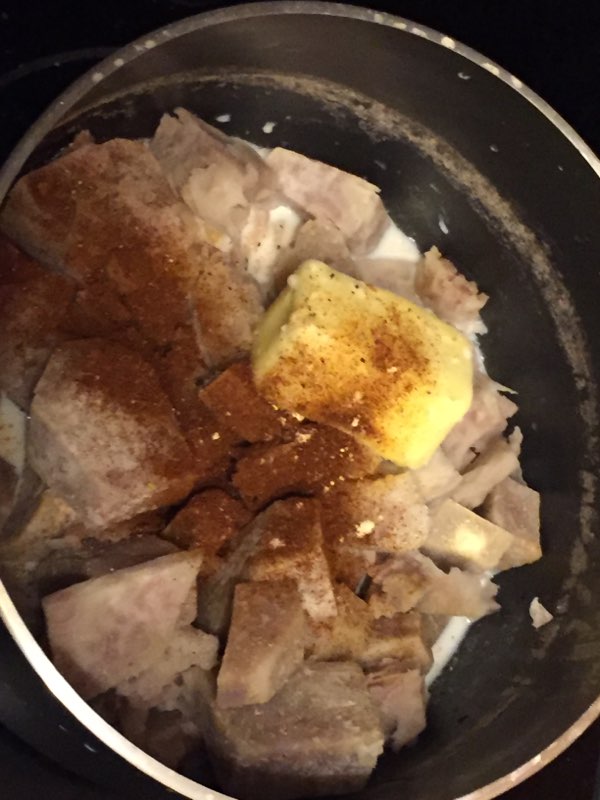
Add in butter, milk and any seasonings you would like and then mash until it gets to the consistency of mashed potatoes.
For the next step, I added in about 2/3 of the caramelized onions (leaving the rest for something else, possibly a patty melt). I let the mixture get to room temperature and then added in the cheese. I did not want the cheese to melt yet, but if you would prefer to have melted cheese, then you should do it. I preferred to have the cheese intact because I didn’t want to have to deal with the melty cheese when trying to scoop it into the dough (coming later). If you didn’t want to make pierogis, this would still be an outstanding dish as is. The caramelized onions really take this to another level. I heated some up later and my opinion is that it was absolutely delicious. If you are going to be making the pierogi, then this mixture should be at room temperature when the dough is ready.
PIEROGI DOUGH
2 cups flour
1/2 teaspoon salt
1 large egg
1/2 cup sour cream
1/4 cup softened butter
Mix together the flour and salt. Add the egg and mix together. It will be mostly flour, with a few lumps. Add in the sour cream and softened butter. I started this with a fork, to make sure the butter gets properly incorporated. Once the butter was broken down and blended in, I used my hands. Work the dough with your hands until it is able to hold together in a ball. If the dough is too sticky, add a little flour. If it’s too dry, add a little sour cream.
Once the dough is able to be formed into a ball, cover it in plastic wrap and place in the refrigerator. This should be refrigerated for no less than 30 minutes, but can be kept for up to 2 days.
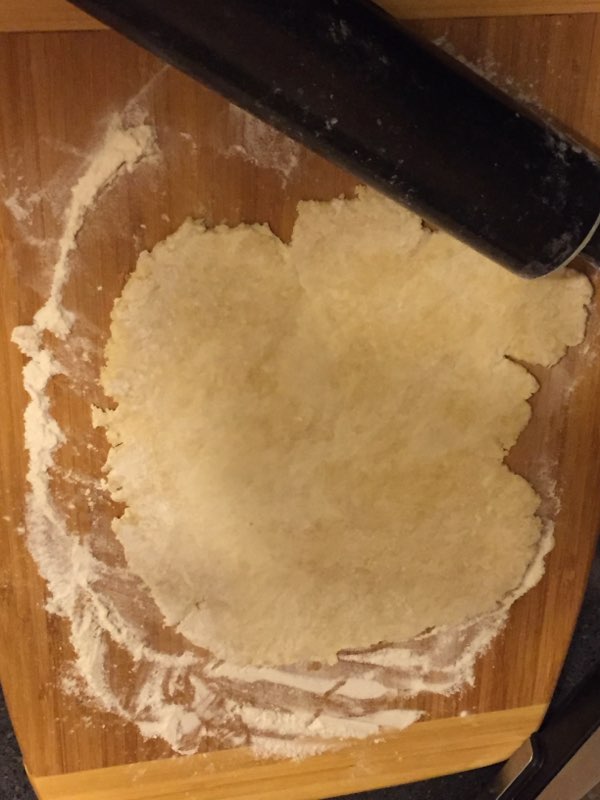
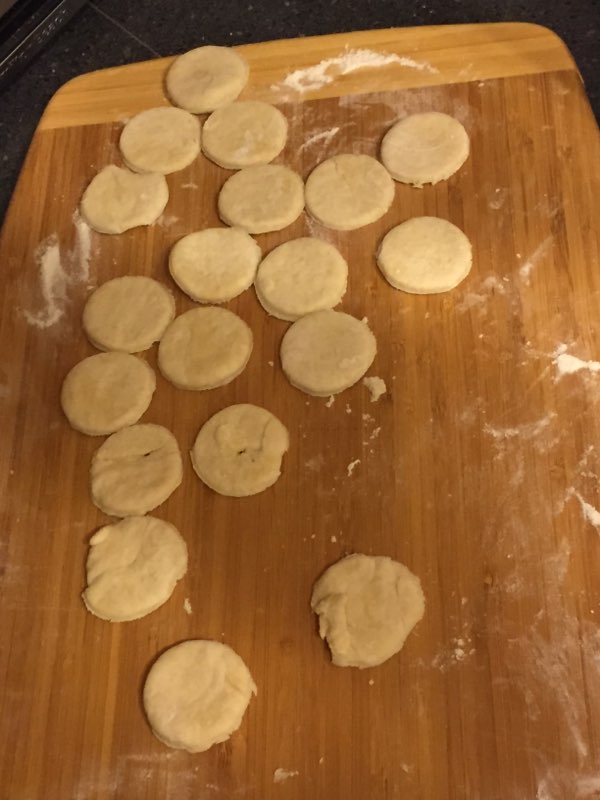
Once you are ready to make the pierogis, remove the dough from the refrigerator and roll out 1/2 of the dough until it’s a little more than 1/8 inch thick.
If you want, you can roll the dough to be 1/8 inch thick and then use a two inch round cutter. I rolled the dough until it was slightly thicker than 1/8 inch, and then used a shot glass to cut the dough.
I then took each shell and rolled them a little more to get them flat.
Next, add about 1/2 teaspoon of the mashed malanga mixture into the center of the shell.
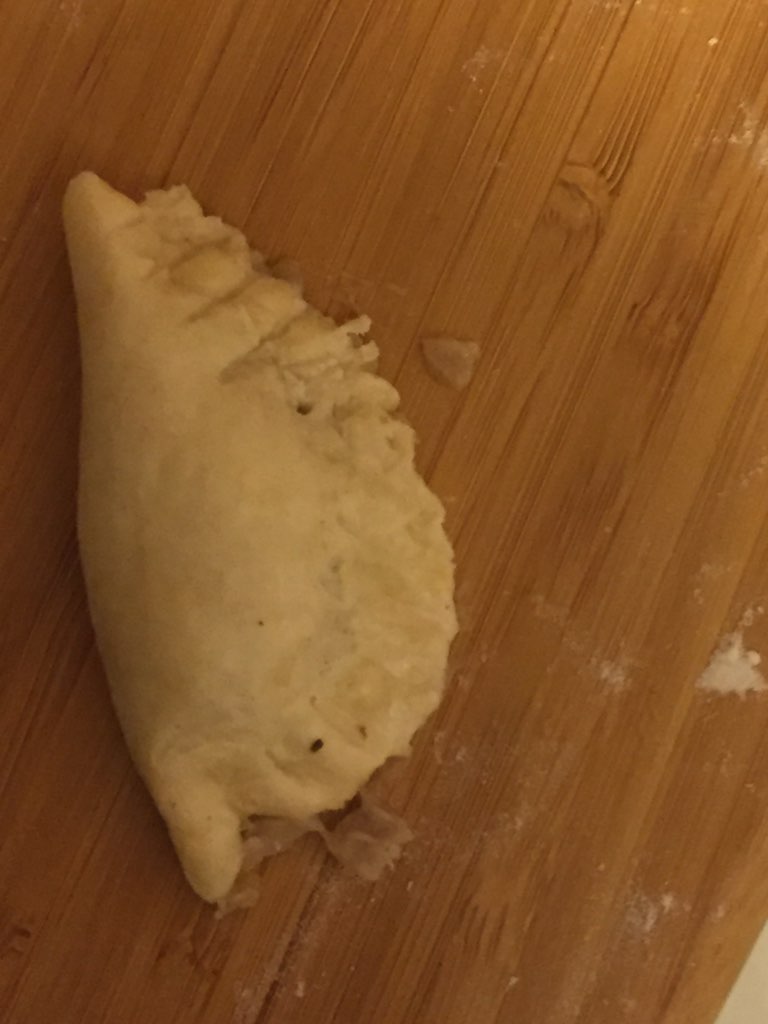
Fold the shell over and pinch the edges together.
Use a fork to seal it again. If a little bit of the filling sticks out, that’s okay.
Once you have the first half of dough complete, you can start working on the second half. This should yield 3 – 4 dozen pierogi.
Boil a large pot of water and add in salt. Place the pierogi in the boiling water. Make sure there is enough space that they don’t overlap (otherwise, they might stick together).
These should take 5-10 minutes to cook. They will float to the top when they are ready. I took them out as soon as they started to do a little dance.
They are now ready to enjoy. I had sour cream as a side for my first batch and butter for my second. The flavor is really good, so I prefer that it is not masked with anything overpowering, but that is my personal choice. The flavors all came together really well in this batch. It tasted a lot better than what I was expecting, so it was a nice surprise.
If you don’t want to cook the pierogi all at once, you can refrigerate the uncooked pierogi for another day, or you can freeze for a few weeks and then take out and boil when desired. If you didn’t use all the dough, you can always set it aside for another day and make something else (maybe cut them up and cook them in a nice broth based soup during the cold Fall and Winter months).
These can be filled with different things. I chose my ingredients because they fit the flavor profile I was craving. Some might prefer sauerkraut. Some might want the onions to be used as a topping instead of as part of the filling. There are many options out there. Just choose what works best for you.
I hope you enjoyed this recipe. Any feedback or thoughts are happily appreciated.
As you may have figured out by now, I truly enjoy food. I go to different places and try different foods. I also like cooking and preparing my own meals from time to time. Today was one of those days. I had an idea for what I wanted to make, but it was a matter of getting some special ingredients and having a good block of time to be creative.
Here are the Ingredients for today’s dish:
1 1/2 lbs malanga
1 lb sugar snap peas
8 ounce can – diced water chestnuts
1 pound ground chicken
1 1/2 cups rice
3/4 cup multi-grain
6 cups water
1/4 teaspoon allspice
1/8 tsp cumin
1/8 tsp nutmeg
1/8 tsp cardamom
1/4 tsp dried marjoram
1/4 tsp dried rosemary
3 Tablespoons Sesame oil
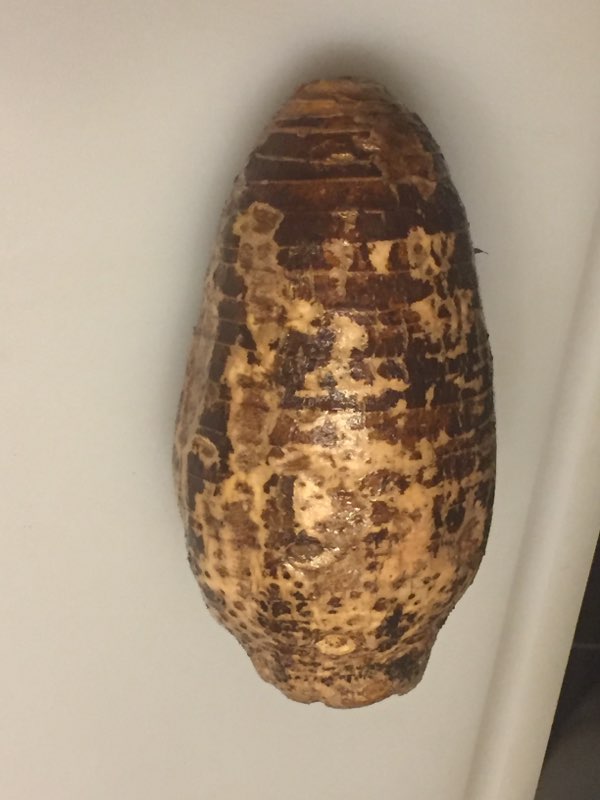
There was a nice flow to the preparation of this dish. Malanga is a root vegetable that is similar to taro. The cooked flavor is similar to a potato (I think it’s in between a potato and sweet potato). This is a very difficult vegetable to cut, so please use caution when cutting. I cooked the malanga with the rice, so I wanted to make sure it was cut up in bite-sized pieces to make sure it would cook properly in the rice cooker. Rinse before you start cutting, make sure the outer skin is removed, and then rinse again after the malanga has been cut into bite sized pieces.
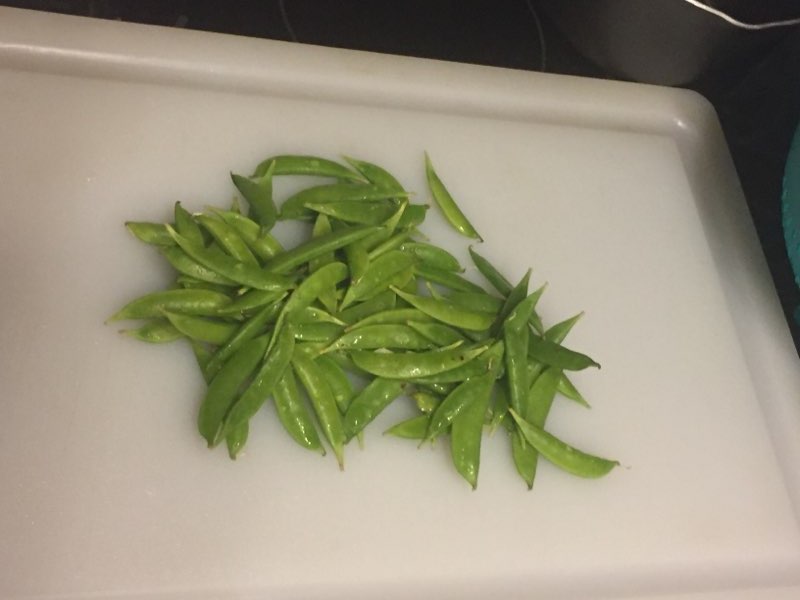
The next bit of prep work was for the sugar snap peas. These took a bit longer than expected, so I’m glad I did them first. I rinsed the peas first. Next came the preparation. You need to take off the ends and slide them along to remove the membranous string. This is the part that takes the longest. Once the preparation is complete, rinse again.
Next is the cooking of the rice. I added the rice and the multi grain mix (the picture is the one I like to use). I then added the water and swirled it all around. I put in the cut up malanga and then swirled the water around again. I set the rice cooker to cook. This should take 20-25 minutes, depending on the rice cooker, which leaves you plenty of time to prepare the rest.
I started by putting the sugar snap peas in a wok with a little water. I cooked this for about 5 minutes. I didn’t want to overcook the peas, and I knew they would do some more cooking later on. I removed them and the water from the pan.
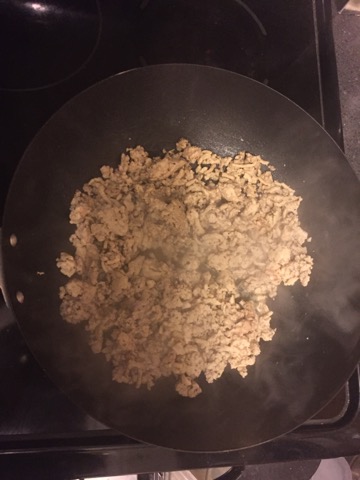
The next step was cooking the ground chicken. Once it was completely cooked through, I removed the fat.
I then added in the can of diced water chestnuts, including the liquid, and mixed these together. If you would prefer to remove the liquid, then that will work as well.
I added the sugar snap peas and mixed them in. I then reduced the heat to medium low and let it continue to cook while the rice was still cooking (about 10 minutes).
Once the rice cooker clicked off, I added allspice, cumin, nutmeg, cardamom, marjoram, and rosemary to the chicken and veggie mixture.
When the rice finished giving off steam, I opened the lid to make sure it was looking good. The malanga has a slightly purple color (I think taro is usually a bit of a darker purple).
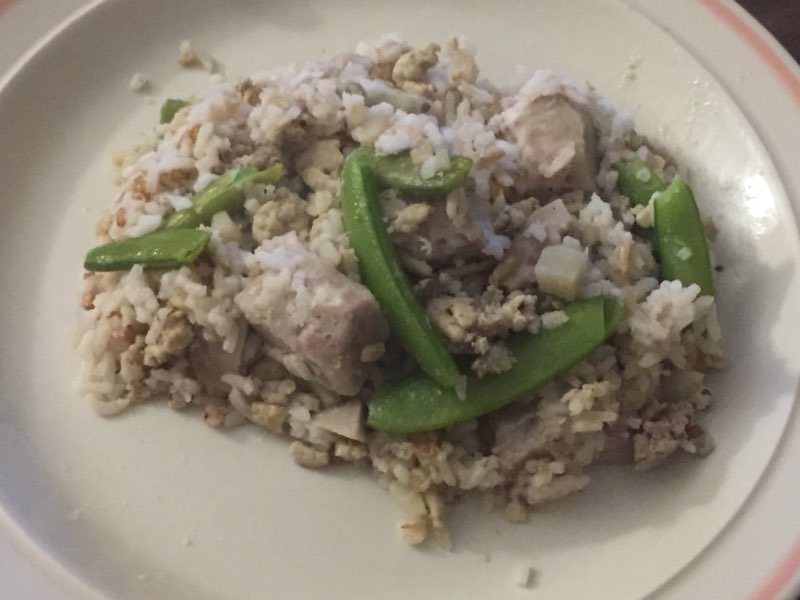
Next is the combining of the meat and veggie mixture with the rice mixture. Once these have been combined well, drizzle in three tablespoons of Sesame oil and give it another stir.
The end result was delicious. You can definitely use different veggies and different seasonings to make it your own. Sometimes when I cook, I try to find lower sodium alternatives, so I don’t always add salt. But if that’s something that you enjoy doing, then you should do it. When I make this again, I’ll probably add some minced garlic and minced ginger. I added some specialty sauces to a couple of bites, but it was good without them as well. The ground chicken flavor wasn’t prominent throughout, which meant that it went according to plan. There are times when one portion of the dish will overpower everything else in terms of flavor. I prefer having an overall balance, where you can have individual bites to taste how each component stands out, but when eaten altogether it just provides a special greeting to the tastebuds.
I hope you try this dish and give it your own unique spin. If you do, I’d love to hear about how you made it and how it all worked out.
As you are probably aware, I am a big fan of Big Belly Deli in Sykesville, MD. It’s not just because it’s close to my house, it’s because the food is really good. I’ve gone more often than I’ve posted on here. I actually went yesterday and got a cup of chicken corn tortilla soup and a side of Macaroni and Cheese. The macaroni and cheese was really good, so I was happy with that. But the soup was spectacular. It was a cream based soup, had some nice chunks of chicken in there and some really good flavor. They had put a dash of salsa on top and that gave it a unique flavor. I regretted only having a cup instead of a bowl.
I like to check out the breakfast and lunch/dinner specials, just in case something really catches my eye, and I have the time to get something. They post the lunch updates around 11 AM, and as I was checking this morning, the post indicated:
Today’s special is two pieces of chicken fried steak, homemade mashed potatoes, pumpkin glazed carrots all topped with sausage gravy!
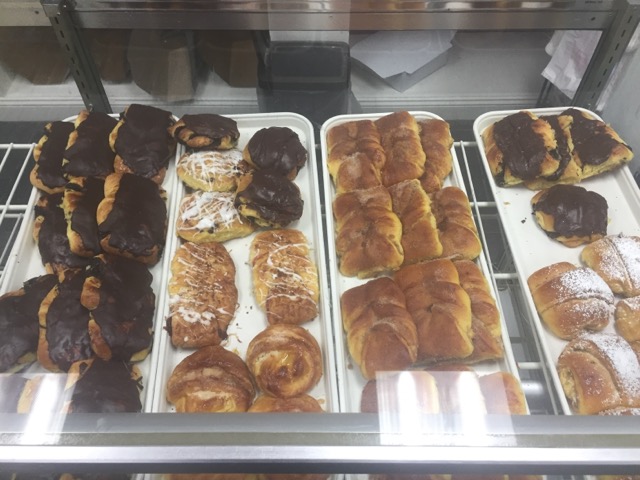
I had to try it. One of the other things I do when I go there is to check out the desserts. Sometimes I just drop in to see what they have. They make their desserts fresh, so there are new options every day.
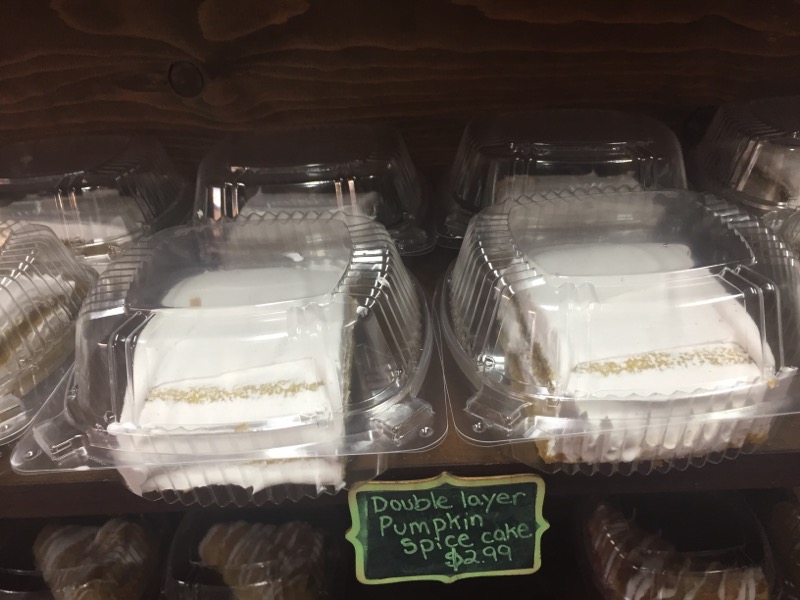
These are just some of the options that were available today. I have had their Moon Pies before and was really tempted to get one of those, but I opted for the Double Layer Pumpkin Spice Cake. I had two reasons to choose that: 1) I hadn’t had it before, so it would be new to me, and 2) I still think it’s pumpkin season, so I figured I should get it while it’s available.
Now, onto the food. I started with the pumpkin glazed carrots. I’ve had glazed carrots before, but it’s usual honey or butter, but I’ve never had it with pumpkin. This worked really well. The carrots were nice and soft, while still maintaining their shape. The glaze had the nice spice flavors to it, as well as some sweetness. I went through these fairly quickly. I might have to go back to ask for the recipe, since these might be fun to make (and I could consider it healthy since it’s a vegetable dish).
There are two pieces of steak in there (one on top of the other). The steak had the perfect tenderness to it, with the breading cooked properly. No oily feeling in the mouth while eating, no burned pieces. The mashed potatoes were also really good. Creamy, with small chunks here and there. I’ve had their mashed potatoes many times, and they’ve always been good. The last component to this dish is the sausage gravy. I was skeptical about it at first, since I’m used to having chicken fried steak with a traditional brown gravy. But the way they make their gravy and the way the dish was put together, this really worked. I was very happy to have gotten this and will be getting it again down the road if they decide to make it again. And this is great food when it’s in the 40s outside.
Although you might not be able to have the proper perspective on this dish, this is a lot of food. It’s two meals for me, but might be three or four for someone else. The bowl is 9 inches across, so it’s in a large container and definitely has some weight to it. You pay a good price for a large amount of food, which is always nice. But it’s even better when the food is really good.
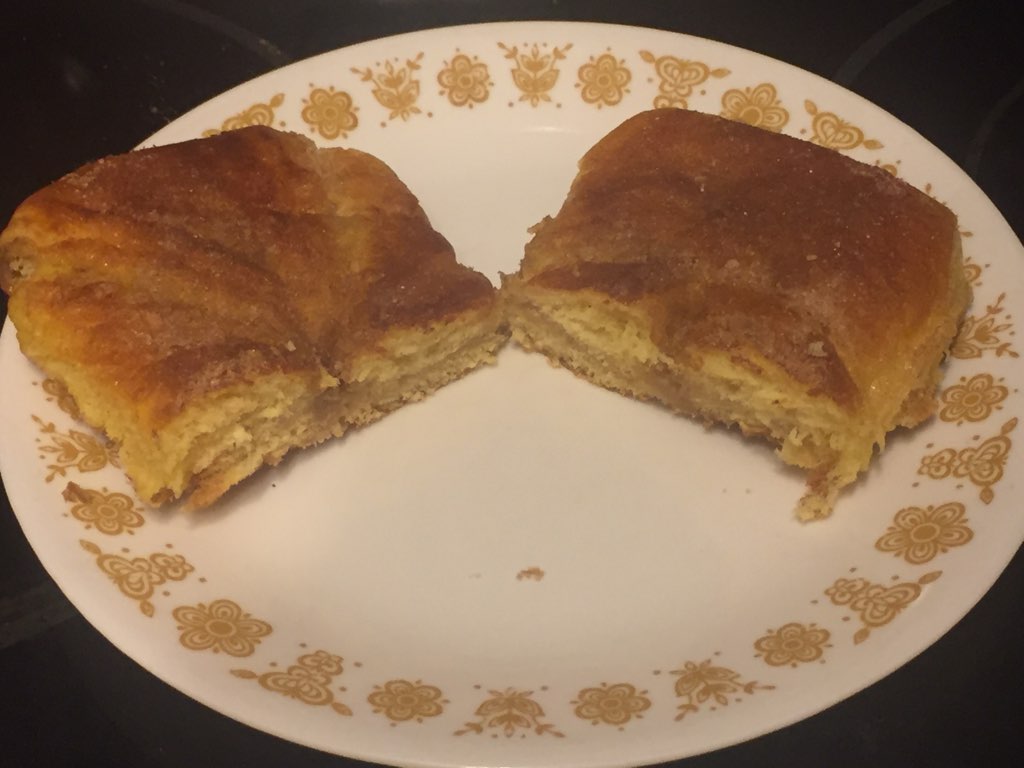
After taking a little break, it was time for dessert. I decided to have this slice of cake over two meals, so I did not eat it all at once. I probably could have, but I do have the ability to show some will power from time to time. The flavor of the cake was really good. It was a little denser, due to the pumpkin, but had the nice pumpkin spice flavors to it. The frosting was definitely the star. There is a light and fluffy consistency to it. There is a sweetness to it, but not overly sweet. The spices in here were subtle, which created a balance with the sweetness. And when combined with the layers of cake, it made for a really nice dessert.
I’ll probably start a separate category for Big Belly Deli, since I go there so often. I’m glad that I can always try different items on the menu that are good, and glad that there are specials every day as well as freshly made desserts every day. It’s easy to stay positive when you are eating the food from here.
This morning, I wanted to go out and about for a short time to finally try Sion’s Bakery in Pikesville.
The sky was beautiful this morning – I headed out a little before 7AM. It’s tough to get good pictures when you’re driving, and the scenery that would be a perfect picture are usually where you can’t stop.
My first stop was at Coffee Bean & Tea Leaf, where I got a Cookie Butter Ice Blended. It wasn’t until after I ordered that I discovered they had just started their peppermint flavors, so I know what I’ll be getting the next time I’m there.
Sion’s Bakery is just a few blocks away from Coffee Bean & Tea Leaf, so it works out really well. They were still doing a lot of baking, so their inventory wasn’t as huge as it would be if I was there an hour or so later. They did have a nice array of cookies, cakes and sweets, though. I opted for a chocolate danish and a cinnamon danish, and then I drove myself back home.
I started with the Cinnamon Danish. Just to be clear, I only had half of each of these danishes, and saved the other half for tomorrow. The Cinnamon Danish had nice flavor to it. It was a mild cinnamon flavor, but it was spread throughout the pastry. This is definitely one that goes with milk, coffee, or something else.
I followed up with the Chocolate Danish. This one was really good, my favorite of the two. The chocolate icing on top was good, but having the layers of chocolate on the inside really helped keep this moist and provided good flavor.
This was my very first visit to Sion’s Bakery, but it will not be my last. I would like to try some of their cookies in the future and some cupcakes as well. If they happen to have chocolate rugelach available, I would try it. I also want to try their Chocolate Mandel bread. I’ve seen it in other bakeries before, but I’ve never tried it, so it would be fun to try. They have some sugar free treats, which is good for people who are on sugar free diets. They also have knishes, which I want to try in the future. They don’t look like the ones that I’m used to seeing in New York, but that’s not a bad thing. If they are made fresh and in the bakery, I would want to taste the difference.
It’s always a good thing to visit a place for the first time and have a positive experience. It makes it much easier to justify going back again. I have a feeling I’ve said this before, but it still holds true. Stay positive!
I have a tendency to eat a lot of meat and to not always eat healthy. There are times, though, when I want to switch things up. I’ve made a variation of this dish in the past, but I was really happy with the results for tonight’s dinner. This is a vegetarian, low-sodium dish. I eyeballed some of the spices, but will put down my best guess estimates for the portions that I used.
Ingredients – Rough estimates
1 pound carrots
1/2 pound onion
2 pounds potatoes
1 5 ounce bag baby spinach
1 Tablespoon Olive Oil
1 Tablespoon butter
1 teaspoon chopped ginger
1/2 teaspoon garlic powder
1/2 teaspoon turmeric
1/2 teaspoon ground coriander
1/4 teaspoon pepper
1/4 teaspoon caraway seeds
1/8 teaspoon of citric acid.
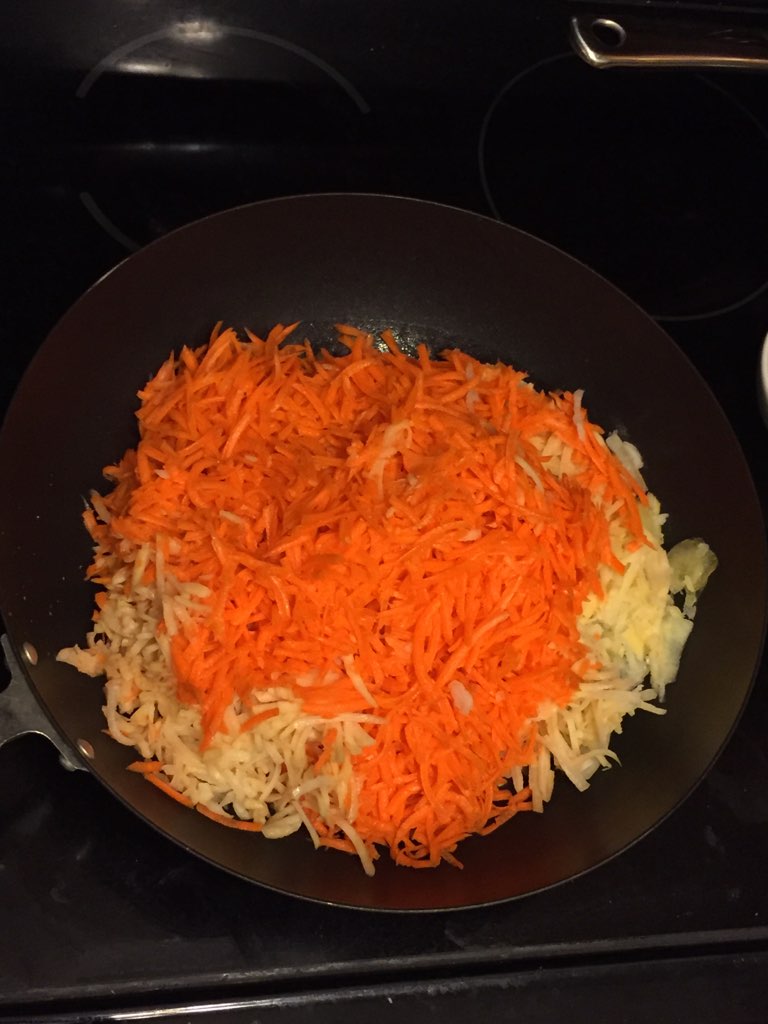
I used the grater attachment for my Cuisinart and grated 4 large carrots, 1 yellow onion, and 2 large potatoes.
I heated one tablespoon olive oil and 1 tablespoon butter in a wok. Once the butter was completely melted, I added the grated vegetables.
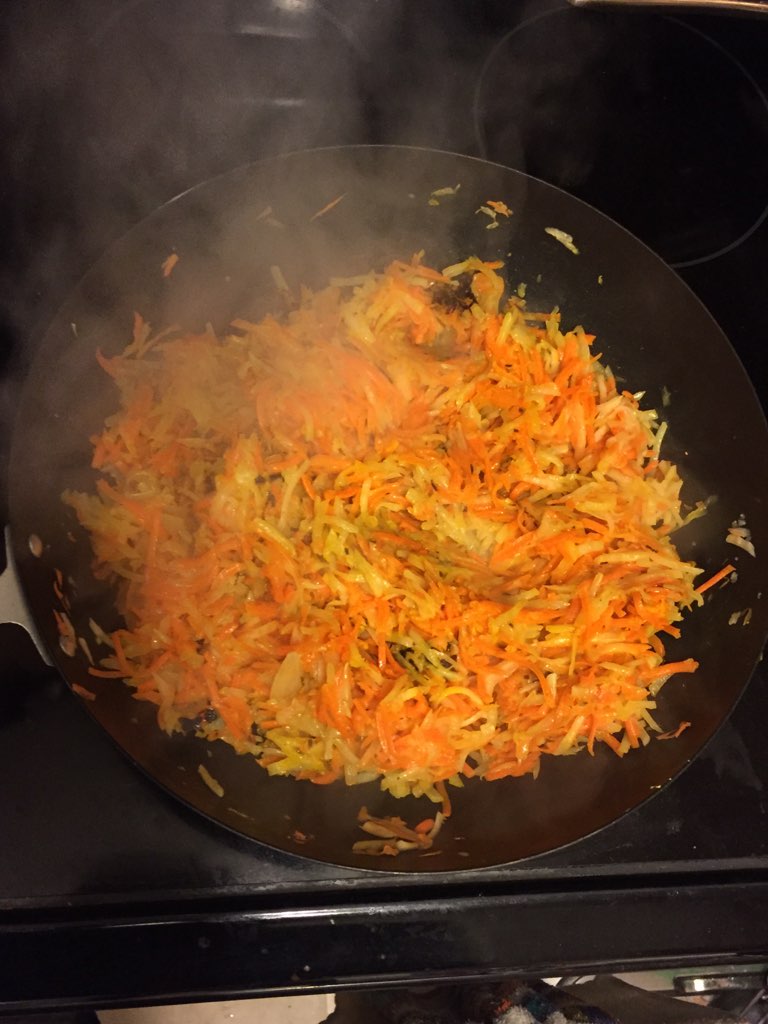
I continuously stirred the vegetables for about 10 minutes. The carrots and potatoes were still a little firm, but they were definitely getting closer to the proper texture.
I then added 1 teaspoon of chopped ginger (from a jar), 1/2 teaspoon garlic powder, 1/2 teaspoon turmeric, 1/2 teaspoon ground coriander, 1/4 teaspoon pepper, 1/4 teaspoon caraway seeds and 1/8 teaspoon of citric acid. I continued to stir for about 2 minutes, until there was a consistent release of steam.
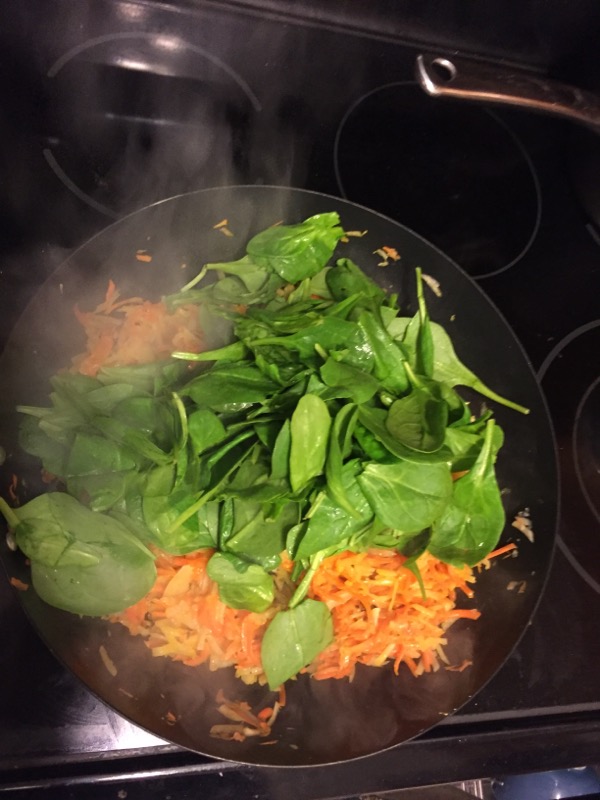
I then added one bag of baby spinach (I rinsed the spinach first, and shook out all of the water) and continued stirring for another 3 minutes.
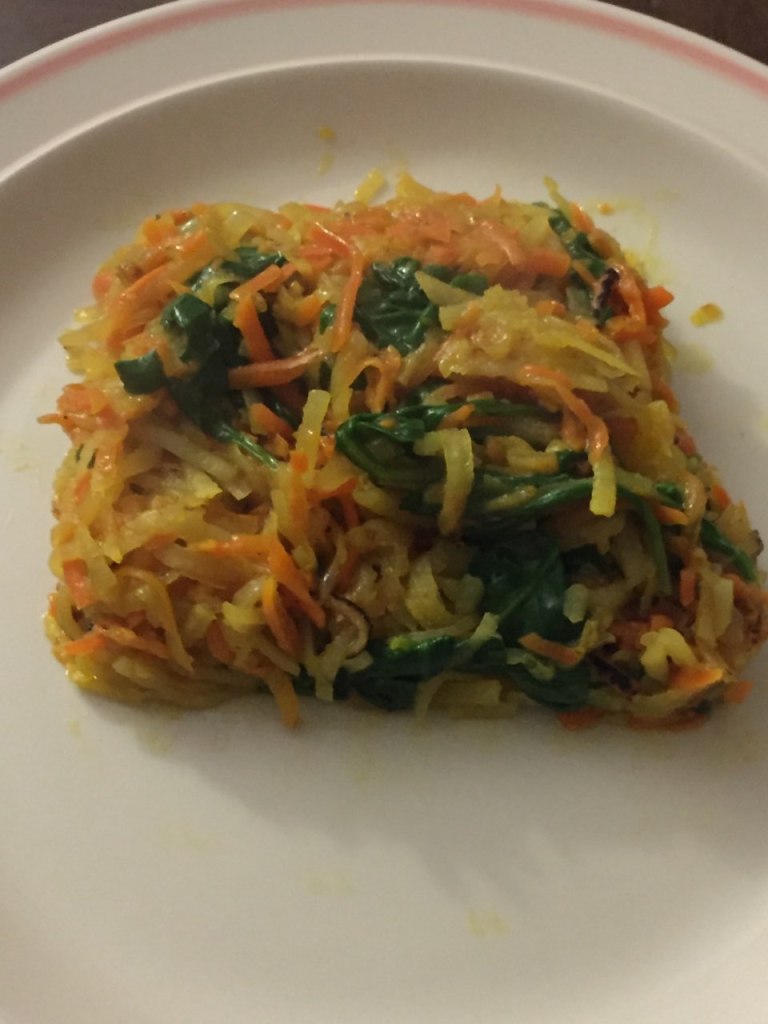
Once the spinach leaves lost their stiffness, I removed from the heat. The spinach would continue to cook, but would not get overcooked and mushy.
It was ready to plate and eat. You can add seasonings or sauce if you want, or just have it like this. I had this as my main dish (I ended up having a second portion as well). This would work as a side dish. I’ve made this with grated broccoli stalks instead of spinach in the past, but would caution you to use just a little broccoli stalk (and shave off the outside first). They can take longer to cook, but do provide additional fiber.
I used citric acid instead of salt, but that was just my preference to make this a lower sodium dish. I like to use ground turmeric from time to time. There are many health benefits, and it adds flavors that my taste buds enjoy. Ground coriander also brings some additional health benefits. Caraway seeds were something new for me to use. They are good for digestive health, and the seeds add a nice textural element to the dish. If you want to use fresh ginger, garlic and turmeric, I say go for it. I would just recommend adding them after the vegetables have cooked for about 10 minutes and not blending them in with the vegetables at the beginning, since you don’t want to overcook the ginger, garlic and/or turmeric, and possibly lose of the potency of the flavor or health benefits.
Whatever you decide to do, I hope you have fun with this healthy, flavorful, and colorful meal.
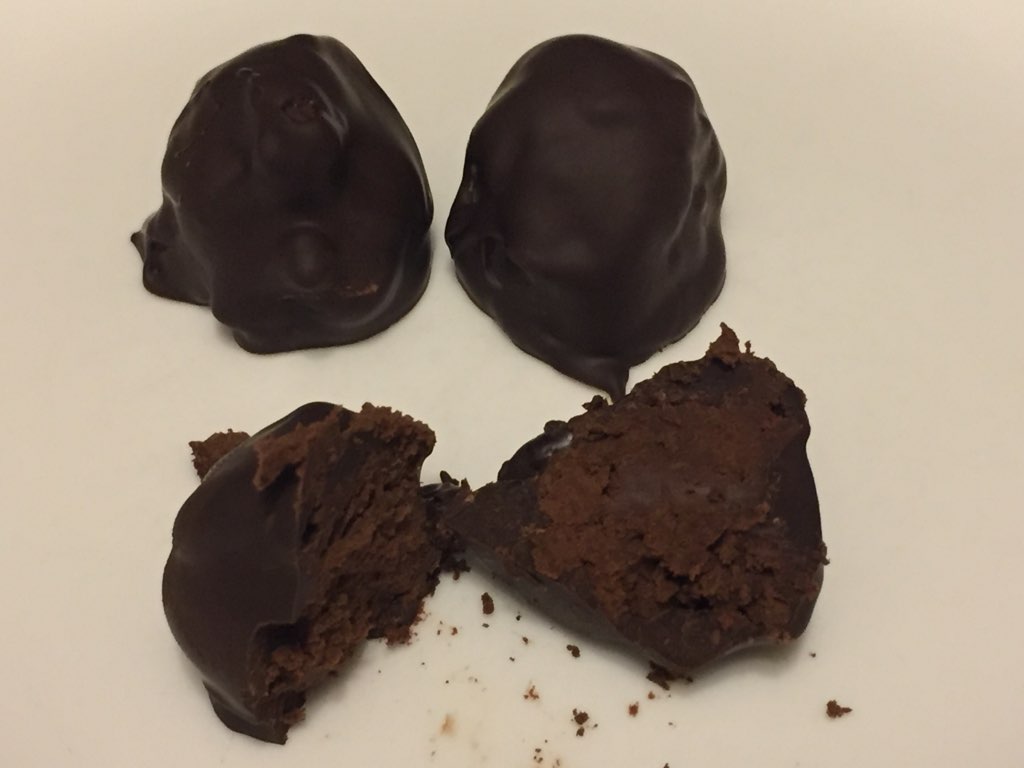
Homemade Dark Chocolate Truffles. I like the sound of those words so much, I had to repeat them.
It’s been a few years since I made some chocolate truffles, but I wanted to make them this weekend, and today was the perfect day for it. The process can take 6-8 hours from start to finish, but there is plenty of time for breaks in between. The recipe that I use is from a book titled “Chocolate: From Simple Cookies to Extravagant Showstoppers” by Nick Malgieri. I have a couple of slight differences from his recipe, but I use his as the base for mine.
The type of chocolate that you use matters. You don’t have to use the most expensive chocolate in the world to make these, but you want to make sure that there is a level of quality to the chocolate, since you don’t want to have it break down during the steps that involve melting. When selecting the dishes that will be melting or mixing the chocolate, please make sure that everything is dry. Water can cause the chocolate to seize, which will result in a lumpy, muddy mess of chocolate. It can be fixed or used for other things, but will not be good for the truffles.
The first part of this recipe is the Center of the truffle. 1/2 cup heavy cream, 2 tablespoons unsalted butter, 1 tablespoon corn syrup and 8 ounces of melted chocolate. The recipe calls for heating the cream, butter and corn syrup in a nonreactive pan and bring to a simmer over low heat. Remove from the heat and wait 5 minutes. Add the cream mixture to the chocolate and whisk smooth.
I use a slight variation. I heat 1/2 cup heavy cream, 2 tablespoons unsalted butter and 1 1/2 tablespoons corn syrup in a pan over medium low to low heat. As soon as the butter is melted, I remove from the heat and continue to stir.
If you have a glass blender/mixer bowl, place the chocolate in there. While the cream mixture is melting, I heat the chocolate in the microwave over medium – low power for 30 seconds at a time. You don’t want the chocolate to be melted. If it is at a slightly soft consistency, it is done. The chocolate disks that I used took about 1 minute 45 seconds, but if you have smaller disks or chips, that should take less time, since there is less surface area. You want to make sure the chocolate doesn’t get too a temperature that is too high, or it might break down, which will result in a more grainy consistency.
The cream mixture should have cooled for a few minutes, so you can add that to the chocolate mixture and start whisking together.
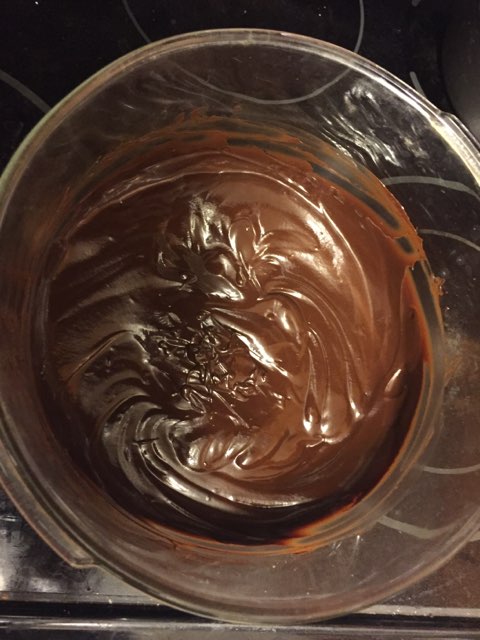
You should have a nice, melty chocolate mixture once it’s all combined. The next thing you have to do is wait. 2-3 hours should be good enough. You want the chocolate mixture to be at room temperature.
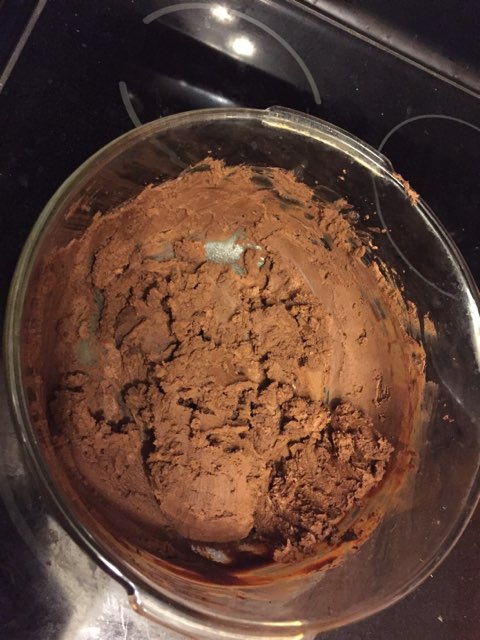
After the chocolate is at room temperature, whip the mixture using an electric mixer on medium speed, for about a minute, until it lightens in color. It should be a duller brown color (similar to the picture above). Make sure you use a scraper or spatula along the bottom and the sides to ensure the mixture is completely combined.
The next step in the recipe is to spoon the mixture into a pastry bag fitted with a 1/2 inch plain tube. Pipe 1/4 inch balls on to the prepared pan. My variation is to use a small scooper/squeezer. It’s similar to an ice cream scoop and can be found in many kitchen stores. I have multiple sizes, which help if I’m making larger truffles, or if I want to make some uniform sized cookies.
I scoop these onto a cookie sheet that has been lined with wax paper. The next step is to chill for at least an hour. I usually put these in a refrigerator for 2 or 3 hours. The next step will involve dipping these and coating them in melted chocolate, so you want to make sure that the centers are chilled enough so they won’t melt as soon as they get into the chocolate to be coated.
Next is coating the truffles. The recipe calls for 12 ounces chocolate and 2 cups cocoa powder. Once the centers are chilled, melt the chocolate by tempering, or allowing it to cool to about 90 degrees. Coat the truffles using your hand, depositing them into a pan of sifted cocoa.
I have a slight variation for this as well. I use a double broiler to melt the 12 ounces of chocolate. You do not want the water on the bottom pot to be touching the top pan. This can lead to burning the chocolate. Once the last bits of chocolate have melted, I add just a little bit of vanilla (less than 1/8 teaspoon). This is just a personal preference. Let this rest for 5 minutes or so, to make sure the chocolate isn’t too hot for coating.
I use one fork and one spoon. I place one or two truffles into the melted chocolate, cover them with the spoon and bring them up with the fork. The chocolate will fall through the prongs of the fork and will be easy to transfer back onto the wax paper. I don’t put them in cocoa powder, but again, it’s just a personal preference.
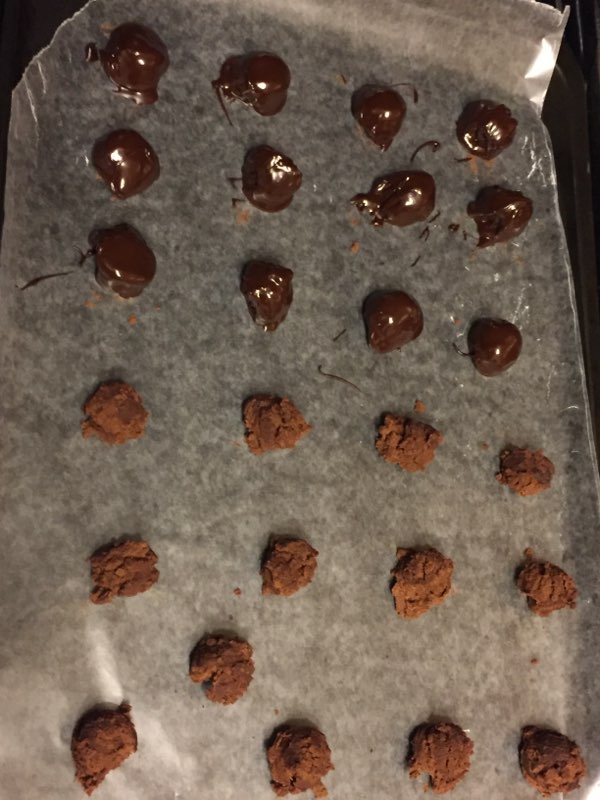
This picture is taken at the half-way point from one of my trays.
This is one of my trays that has been completed. The chocolate is shiny and still very melty.
You can let these sit at room temperature for a couple of hours.
You should be able to notice a change in the appearance of the chocolate as it cools. You can touch the truffles to see if the outer layer has gotten firm. Once it has, they are ready to be eaten.
I used a 75% dark chocolate for the center and a blend of 75% and bittersweet for the outer coating. In the past, I have placed the truffles in the refrigerator once I finished coating them. If you do that, you’ll want to keep them refrigerated. If you take them out to sit, they will get melty and you will have chocolate fingers. There is nothing wrong with that, but I wanted to give you a heads up.
You can always mix things up. If you want to add some unique flavors to the center, add a little more chocolate if you are going to use a liquid. I’ve used peppermint extract, Amaretto, Espresso, etc., to change things up. I’ve also switched peppermint extract for vanilla for the chocolate coating, but it still has to be a very small amount. Too much liquid will affect how the chocolate will settle and solidify. If you want to use an outer coating of chocolate powder go for it. If you want to try something different, you can also change things around. Powdered sugar, cinnamon, chopped nuts, sprinkles, etc.
If you want to try the center and chocolate coating with different chocolates, then go for it. Make it your way. It’ll be delicious. And if you make any mistakes, they will be delicious mistakes!
I was not originally planning on putting up a post today, but sometimes good things happen and I want to share them.
Today was expected to be a low-key type of day. I was getting a haircut and running a few errands, but planned on being home early and making myself something for lunch. I went to HeadMasters for my haircut and it went well. My stylist asked me if it was warming up outside since I was wearing shorts (jean shorts, to be exact) and a t-shirt. I said it wasn’t any warmer, but since it was in the 50s, it was still shorts weather to me.
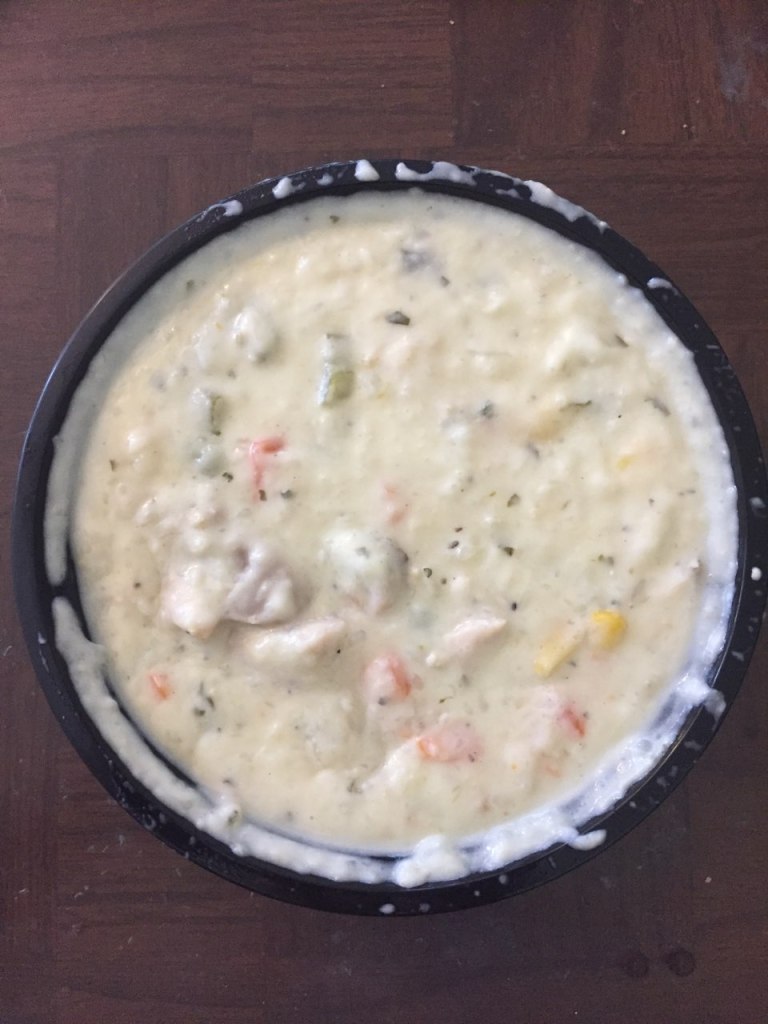
I walked over to French Twist Cafe and ordered a small Pumpkin Mocha Frappe. It was delicious, and I’ll get it again. The Pumpkin Frappe is a vanilla base, but the Mocha base adds a different flavor dynamic, which I enjoyed. I ran a couple more errands and then decided to check and see what Big Belly Deli was serving for lunch. They had a chicken pot pie soup on the menu, so I knew I would not be making something at home for lunch.
I had confirmed beforehand that there were no mushrooms, which was a sigh of relief for me. The base was very thick and creamy. This is something that can be tricky with cream based soups, but they managed to keep the soup at the proper temperature, so there was no break-down of the liquid. The chicken had good flavor, and the variety within the bites made it easy to see that this was fresh chicken that was pulled and then chopped (not basic chicken breasts or thighs that are uniformly sliced). There was corn, carrots, green beans, peas and potatoes in there (might have been other vegetables, but those were the ones I could tell). The flavor of this soup really hit the spot. Even though I enjoy the outside temperatures when they are in the 50s, it’s still nice to have a good, hearty soup.
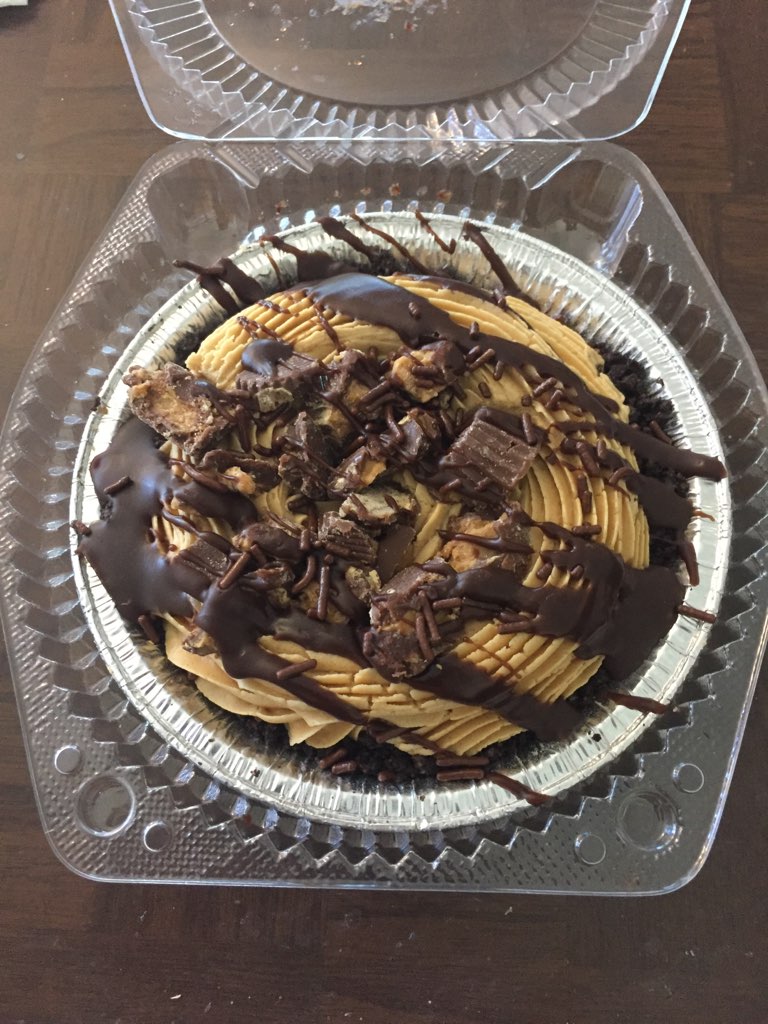
Before I ordered my soup, I was checking out the sweets. There was a Chocolate Peanut Butter Pie that caught my eye, so I ended up buying that as well. The pie is 5″ across, just for some perspective.
The crust on the bottom and sides is a chocolate crust. It’s very crumbly, but it works well with this type of pie. The peanut butter filling was very thick and very rich. This is why I feel that the crust worked well with this. Chocolate drizzle and peanut butter cups topped it off, and was a nice finishing touch.
Right before I left, there were some people who were staring at the menu. They asked me if I had any recommendations. Just like something that happened to me previously at French Twist Cafe, I was very happy to share with them about all of the goodness on that menu. I let them know that I never had a bad experience, gave them some 5 or 6 sandwich options as well. The regular Friday special includes a chicken curry sandwich, and I made sure they had a heads up on that one. Really good flavor, really big portions. Two of them planned on splitting, which is definitely a good idea. Big portions for a good price is nice, but when you add in the quality flavor, it makes it even better. I also let them know to check out all the sweets as well. I’m sure they enjoyed their meal, no matter what they ended up ordering.
A light, easy day turned out to have some moments that compelled me to write a little today. I’m planning on a fun-filled weekend, so hopefully I will have some more Positive moments to share.